Similar to my previous article on how to configure Jupyter to work with R, I want to do some data processing using NodeJS and Dataframes.
Step 0 - Prerequisite
Learn how to install any version of node using node version manager
nvm install 12.0.0
brew install pkg-config
brew install zeromq
Do not use zmq. zmq is deprecated.
brew install ipython
Step 1 - Clone from Github
Change directory to your Mac Desktop.
mkdir ~/Documents/MY_LIBS/
cd ~/Documents/MY_LIBS/
Download the NodeJS Kernel from Github.
git clone https://github.com/notablemind/jupyter-nodejs.git && \
cd jupyter-nodejs/
Step 2 - Create a Directory
The command below assumes that you already have Jupyter installed and you're only adding a new directory within ~/.ipython/ for the remaining steps.
mkdir -p ~/.ipython/kernels/nodejs/
Step 3 - Update and Install
Make sure you are using the latest version of node-gyp
npm i npm -g
This module is compatible with ZeroMQ versions 2, 3 and 4.
npm i --save zeromq@^4.0.0
Anything above 4.0 may not yet work.
Then install the package
npm i && node install.js
Step 4 - Build
Let's do some Node Package Manager building and extension building.
npm run build
npm run build-ext
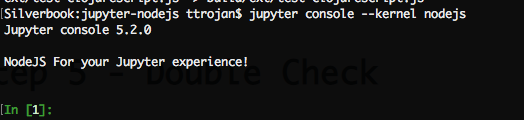
Step 5 - Double-Check
If you can run this command, then you're right.
jupyter console --kernel nodejs
Step 6 - Done
Here's what it will look like if you open your notebook within a browser.

Troubleshooting
The most common error I see has to do with the ZeroMQ package.