Blockchain development on NEAR consists of two parts, front-end decentralized app development (DApp), and back-end smart contract creation. This article provides a step-by-step tutorial on configuring your Mac to do both types of work.
Front-End DApp Development
Step 0 - Create a NEAR Wallet for Testing
Visit https://wallet.testnet.near.org/ and create a Test-only Wallet. You will need this to verify the following installation steps.
Step 1 - Install Node Version Manager
The NEAR Javascript library (near-api-js) requires installing Node Package Manager (NPM). NPM is installed alongside Node, so I suggest going one extra step and first installing Node Version Manager (NVM). It's not that much more work and will enable you to install multiple versions of Node later.
Install Node and Node Package Manager (NPM) through Node Version Manager.
At the time of this article, I am using Node v14.17.x to complete this tutorial.
Step 2 - Install NEAR Command Line Interpreter (CLI) via Node Package Manager
NEAR Command Line Interpreter (CLI) is a Node application that relies on near-api-js to connect and interact with the NEAR blockchain. Create accounts, access keys, sign & send transactions with this versatile command-line interface tool.
npm install -g near-cli
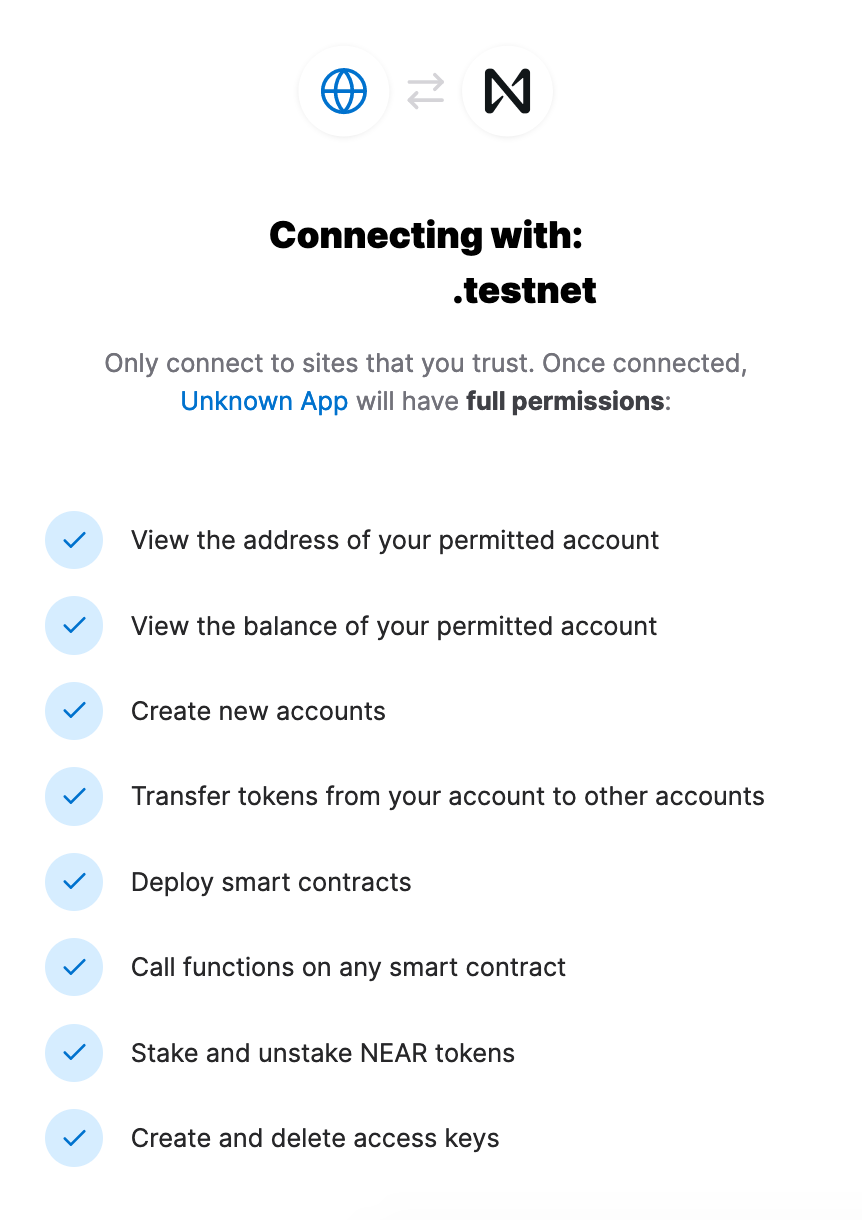
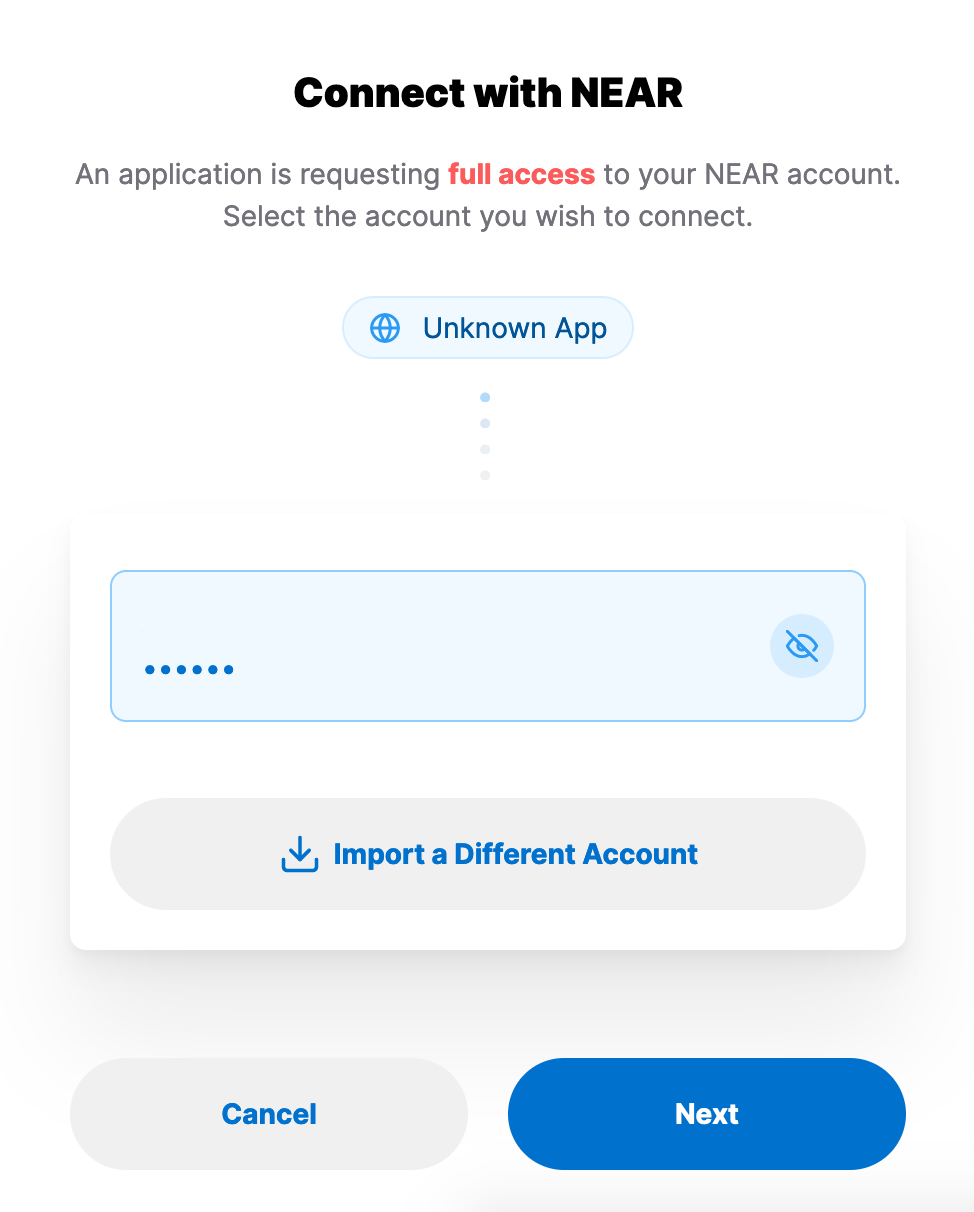
Step 3 - Verify Your Installation
This final step requires you to have a test-only wallet. If things go well, you will see a promt similar to the screenshots below.
Accept the prompts, return to your Terminal and manually enter your <userid>.testnet name.
near login
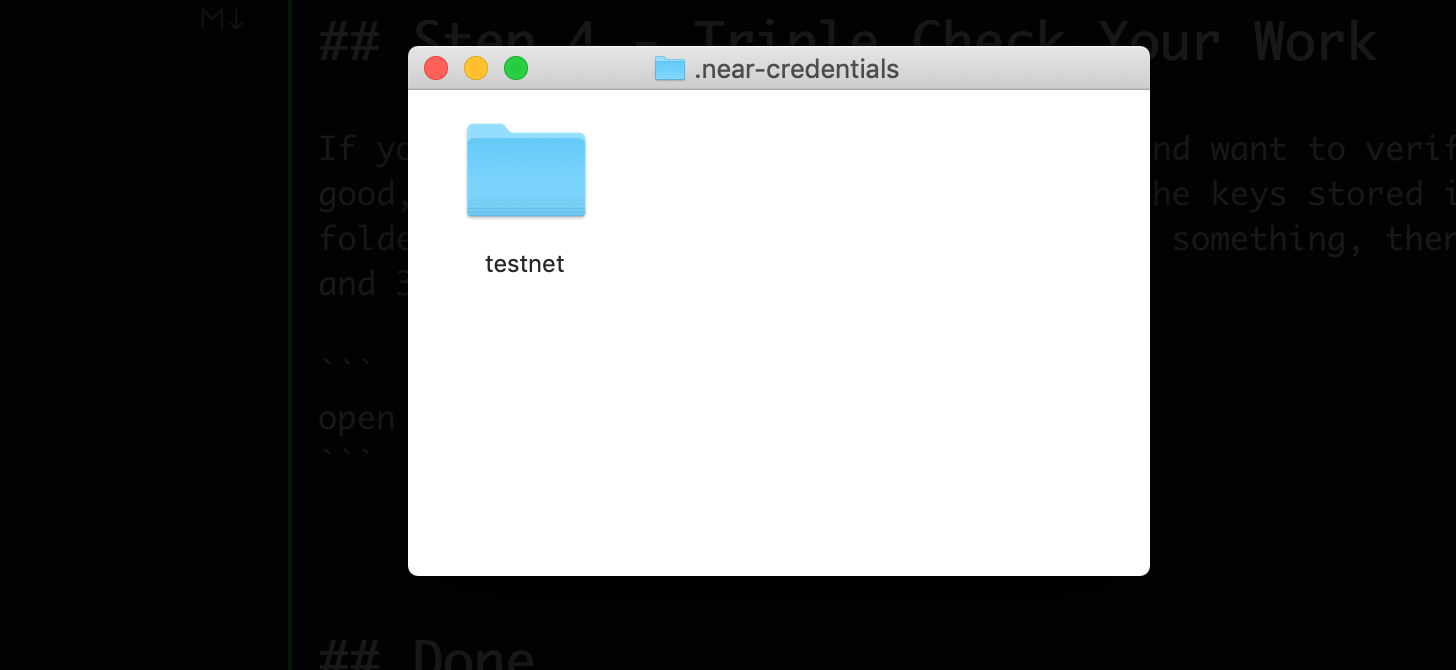
Step 4 - Triple Check Your Work
If you're still uneasy about this workflow and want to verify things look good, go to your Terminal and review the keys stored within /home. If you don't see something, then review Steps 2 and 3.
open ~/.near-credentials
Done
We're done. If you want to dive deeper into NEAR CLI, visit the near-cli docs to learn more.
Now let's switch over and prepare our Mac for back-end smart contract development.
Back-End Smart Contract Development
Step A - Install Rust Toolchain, Rust Compiler and Cargo Package Manager
I created a dedicated tutorial that shows you how to install the Rust compiler (Rustc) and Rust Package Manager (Cargo) through the Rust Toolchain Manager (Rustup) using the Mac Homebrew package manager.
Install Rustup, Rustc, and Cargo using this tutorial.
Step B - Install WebAssembly
WebAssembly (Wasm) is a front-end development toolchain that enables us to process computationally expensive tasks within the Javascript environment. Rust provides specialized tooling and support for WebAssembly. To be specific, wasm-bindgen provides interoperability with JS and web-sys/js-sys provides Rust functions that map to ECMAScript and Web API functions. In other words, we'll be able to do cool stuff like create HTML nodes through Rust function calls.
For NEAR developmemt, Wasm is required because the smart contracts built will be compiled to run on the blockchain.
Note: The name wasm32-unknown-unknown looks hella scary, but it's legit. The "target triple" naming convention consists of three strings separated by a hyphen. The first is the architecture, the second is the "vendor," the third is the OS type.
rustup target add wasm32-unknown-unknown
Create a New Project
You did it! With your newly configured Mac, let's create a new NEAR app connected with a frontend.
npx create-near-app --contract=rust my-first-project
Done
In conclusion, the NEAR blockchain has an abundant number of resources to help developers get started. This article has aimed to help newer developers join the community by teaching them how to set up their Mac environment using Homebrew. If you are interested in learning more about NEAR subcribe to our newsletter.