There are many reasons why you should not install your Python packages system-wide. The three most obvious scenarios I can think of are:
- You are a machine learning scientist who prefers building models using PyTorch but have been asked to migrate it over to MXNet or Tensorflow. Each ML framework will require a different set of libraries to avoid conflict.
- You are a data engineer working on an ETL project. You'd prefer to first develop some code on your local Mac but ackowledge that your project will need to be hosted on a Linux machine. Different operating systems will require a different scripts to work and you want to mitigate the risk of things failing as much as possible.
- You are a software engineer responsible for upgrading a project from Python 2.7 to 3.6. In order to test your code agains different versions of Python, you will need a virtual environment.
This article is for new developers interested in learning the simplest way to set up a virtual environment.
Step 0 - Install Python's package manager globally
This is one of the few times you will ever install something globally.
python -m pip install virtualenv
Here's a quick way to double-check the installation.
virtualenv --version
Step 1 - Create a directory for your virtual environments
This is simply good hygene but the idea is to create a directory where you can store all of your virtual environments.
mkdir ~/Documents/my_virtualenvs
Step 2 - Create a new virtual environment
The -p flag will indicate to create a virtual environment using Python 3 interpreter. Your new virtual environment will now contain 3 folders.
virtualenv -p python3 ~/Documents/my_virtualenvs/my_app_env
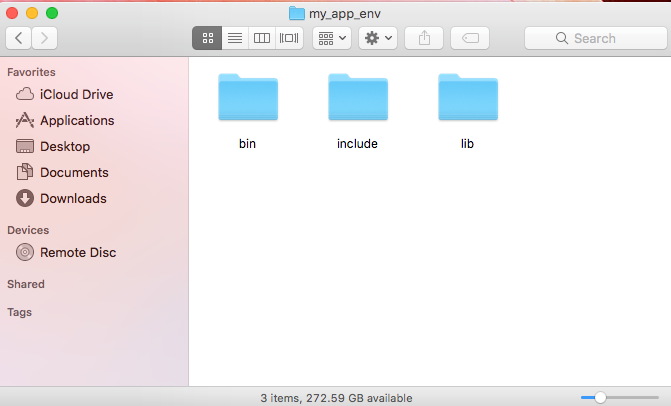
- The
libfolder is for installing packages. - The
binfolder holds the python interpreter and pip installer. This means you now have a dedicated Python and Pip for your environment.
Don't Mix Your Virtual Environment with your App
It's wise to keep your virtual environment folder separate from your app folder. Virtual environments are intended to contain packages, tools, the python interpreter, etc. Your project folder is meant for your source code and is often version controlled. It's not recommended to store your virtual environment inside git.
Step 3 - Activate your environment
Activating your environment will enable you to run Python and pip and install packages.
The file contains the script used to run your environment.
When we activate our environment, we use the . to import shellscript code from bin/activate
. my_app_env/bin/activate
Step 4 - Double check your activation
You can double check your activation by checking which version of python you are running.
python -V
Another check is to list all of the packages within your environment.
python -m pip list

Step 5 - Install libraries
Let's install the requests package.
python -m pip install requests
Take note of -m and how this enables you to invoke pip through the python interpreter. This means that if you are building for python3, it will install the right libraries.
Step 6 - Deactivate virtual environment
That's it!
deactivate
Step 7 - Sharing dependencies
In Node it's called package.json. In Ruby it's called Gemfile. You can do something similar using pip to describe all the packages and requirements required for your app.
python -m pip freeze > requirements.txt
Step 8 - Import existing dependencies into a new project
Suppose you are working in a team setting and you've downloaded the python project from git. All you need to do is find the text file your team uses to freeze dependencies and import it.
In this command-line example, requirements.txt is the name of the file with the dependencies we want to import.
python -m pip install -r requirements.txt
Step 9 - Upgrade a package
You can always upgrade your packages using ```pip`. Simply run:
python -m pip install -U [name of package]


Where to learn about Deep Learning
I've been stumbling upon all of these great resources so I'm deciding to make a simple list. If there's anything else I...