I've spent many years installing and configuring WordPress blogs on EC2, and here's generally how things start.
Manual Install
First download these tools:
# Apache2    => httpd
# PHP        => php
# MySQL Ext  => php-mysql
# MySQL      => mysql-server
# SSL Module => mod_ssl
# OpenSSL    => openssl
Log in as Super User
sudo su
Use Yum package manager to start installing these LAMP stack apps.
yum install httpd php php-mysql mysql-server mod_ssl openssl
From there, I then have to configure Apache, PHP, MySQL, SSL to then get around to these commands:
Download WordPress
wget http://wordpress.org/latest.tar.gz
Unpack WordPress
tar -xzvf latest.tar.gz
For those of you who want me to write a post about doing a manual install, please comment below. Otherwise, here's a right, reliable way to install WordPress using a Bitnami pre-packaged cartridge.
One-Click Install
Step 0 - Register for AWS
Register for Amazon Web Services.
Step 1 - Install Bitnami
Install this Bitnami marketplace package.
Once you install WordPress, review your Bitnami system logs found in EC2 system logs.
Go to Actions > Instance Settings > > Get System Log to find the auto-generated password. This password is what you will use to log into the WordPress Admin.
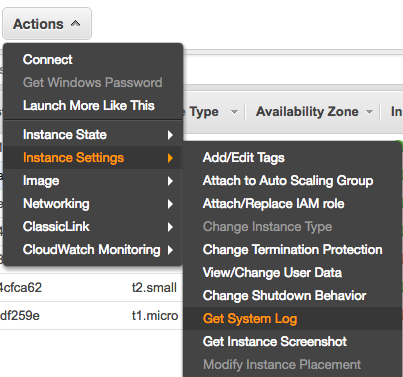
Scroll down until you see something like this.
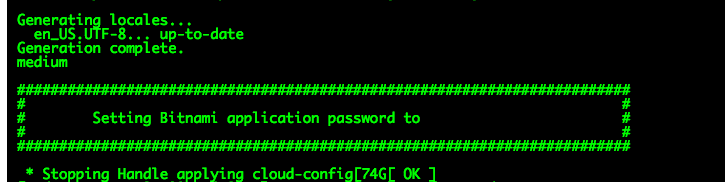
This password is how you access the WordPress admin portal.
# http://www.mywebsite.com/wp-login.php
User: user
Pass: < password found in Bitnami System Logs>
Step 2 - Create a PEM
While installing the package, create a <key name>.pem file and download it to your local computer. This is the key you will use to ssh into your app.
Step 3 - Modify the PEM permissions
Change the permissions on the
chmod 600 /path/to/<keyname>.pem
Step 4 - SSH into EC2
SSH into your EC2 instance
ssh -i ~/path/to/<key name>.pem bitnami@ip.address
Step 5 - Turn off the Bitnami logo
sudo /opt/bitnami/apps/wordpress/bnconfig --disable_banner 1
Step 6 - Change your WordPress site URL
sudo /opt/bitnami/apps/wordpress/bnconfig --machine_hostname <sub.domain.extension>
WordPress Permissions
If WordPress ever tells you to update your permissions for /uploads, here is how to do it.
sudo chown -R daemon:daemon /opt/bitnami/apps/wordpress/htdocs/wp-content/uploads
Part 2 - Manually Installing SSL
The next entry will help you manually install an SSL certificate from GoDaddy.
Troubleshooting
Getting WordPress Admin Password (Alt Method)
If you are having a hard time finding the default password to the WordPress Admin, the second option is to SSH into your EC2 instance and type within the command-line:
cat bitnami_application_password
Related
If you want to do more things to your Bitnami install, read these:
- Modifying robots.txt within Bitnami
- Bitnami Cheatsheet
- Installing an SSL cert manually
- Installing an SSL cert using Certbot
Resources
- WordPress package for AWS EC2 by Bitnami
- Bitnami Cheatsheet
- WordPress the Right Way This digital book is excellent and helps you understand key concepts and conventions.
- Git-FTP If you love Git, but your host only offers you FTP support, this an excellent compromise.