It's essential to have tools that allow you to quickly and efficiently manage tasks and bugs. Pivotal Tracker is one such tool that provides an efficient way to track and manage your software development work. However, what if you could take this efficiency further by creating bug tasks directly from your email? Enter Cloudflare Email Workers, which enables you to automate creating Pivotal Tracker tasks by emailing. This article will show you how to set up Cloudflare Email Workers to create bug tasks within Pivotal Tracker via email, making your software development process even more streamlined.
Cloudflare Workers are a serverless computing platform that is similar in functionality to AWS Lambda functions. If you're a javascript developer, creating a worker is a breeze. To get started, you only need to create a file, write your javascript code, and submit it for production. The process of creating a worker is even easier compared to writing a Lambda script. With Cloudflare Workers, you can easily deploy and run your javascript code without worrying about server maintenance, scaling, and infrastructure. Whether building a small application or a large-scale project, Cloudflare Workers provides the flexibility and reliability you need to bring your ideas to life.
This article assumes you are using Cloudflare Email Routing and you have a Pivotal Tracker account and API Token.
Step 0 - Decide on a Dedicated Email
I wanted to create a dedicated support@email.com address to handle all client success requests. The goal is for users to submit emails to this address and forward them to Pivotal Tracker through a custom javascript worker.
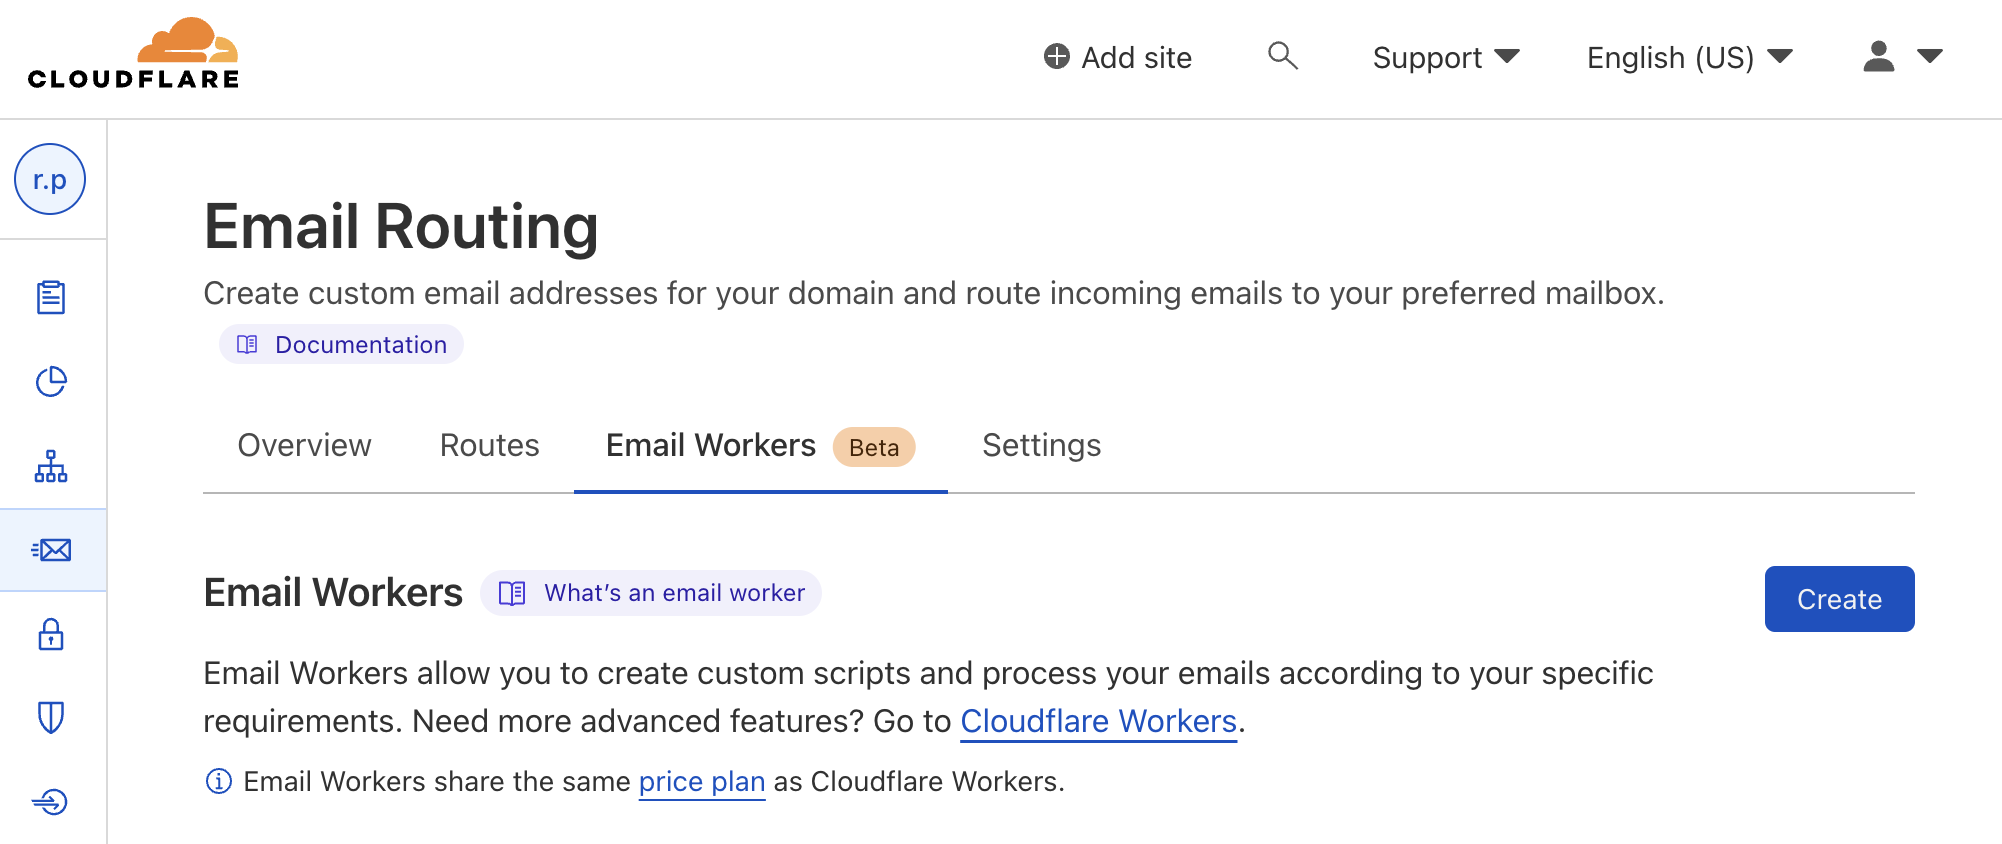
Step 1 - Create an Email Worker
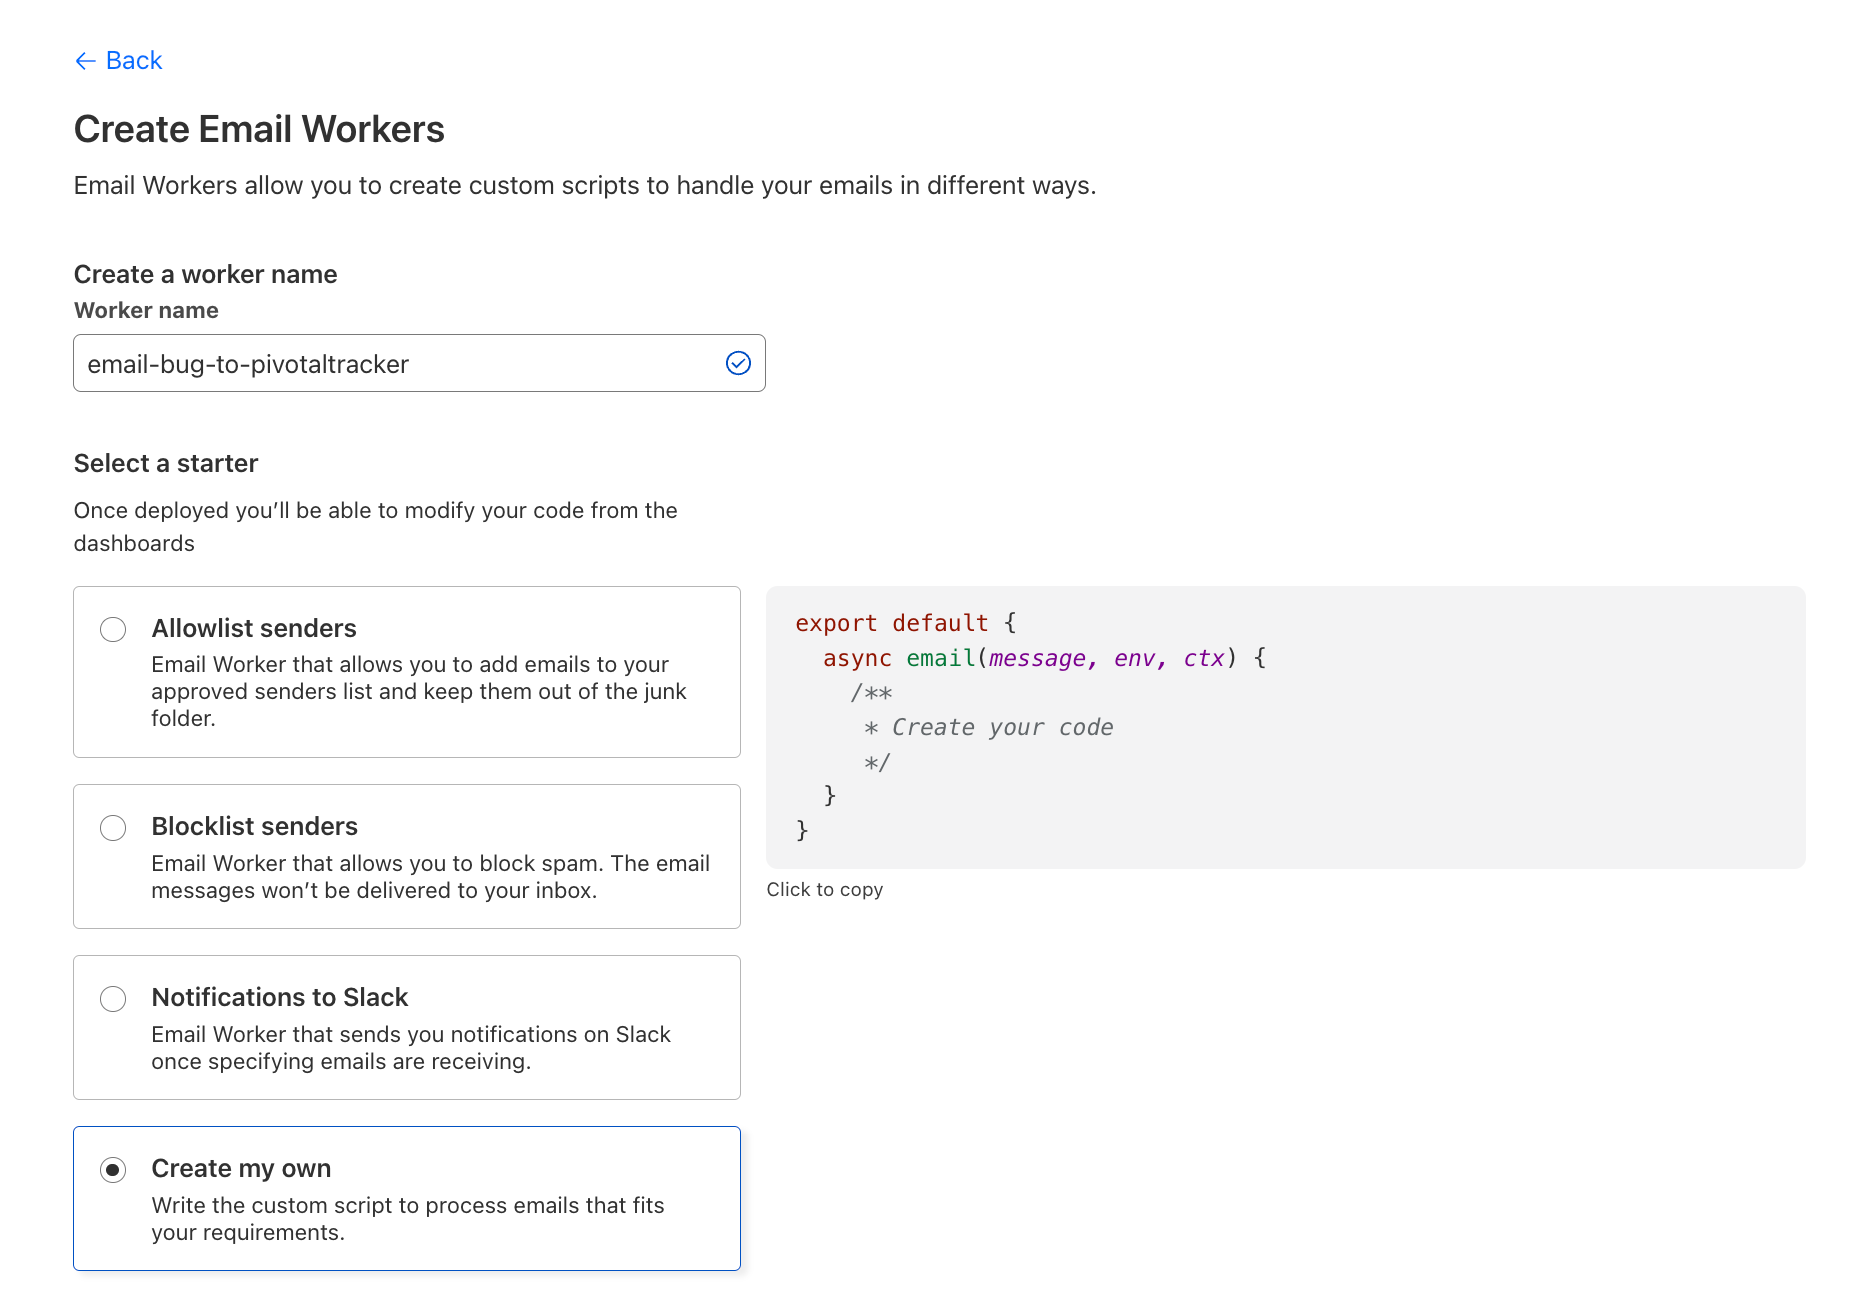
Step 2 - Select "Create My Own"
Step 3 - Paste the Script Below
Replace <YOUR API TOKEN> and <YOUR PROJECT ID> with your Pivotal Tracker info.
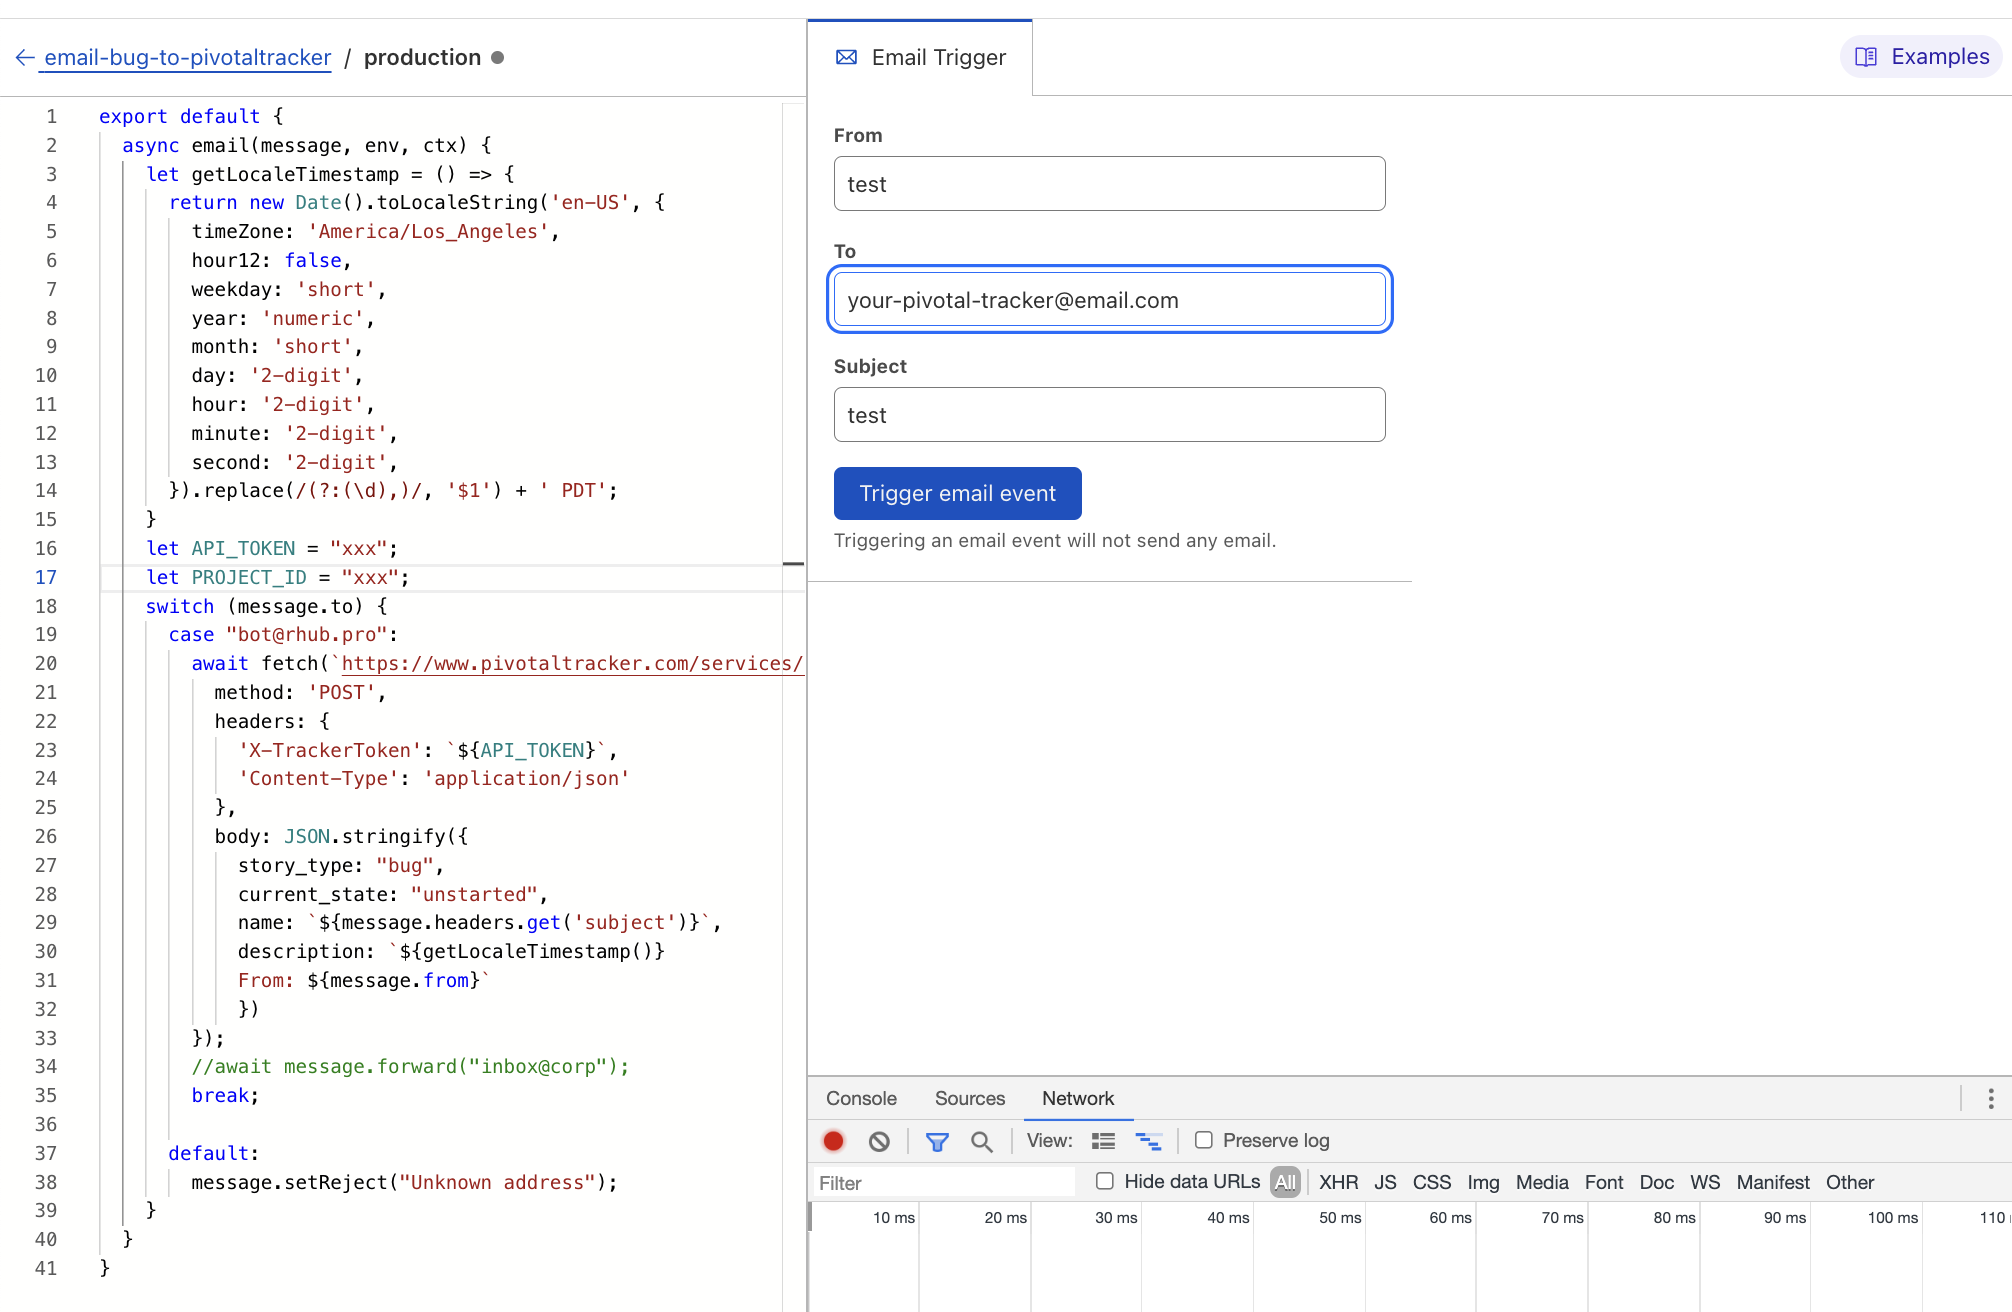
export default {
  async email(message, env, ctx) {
    // Publish a Timestamp
    let getLocaleTimestamp = () => {
      return new Date().toLocaleString('en-US', {
        timeZone: 'America/Los_Angeles',
        hour12: false,
        weekday: 'short',
        year: 'numeric',
        month: 'short',
        day: '2-digit',
        hour: '2-digit',
        minute: '2-digit',
        second: '2-digit',
      }).replace(/(?:(\d),)/, '$1') + ' PDT';
    }
    let API_TOKEN = "<YOUR API TOKEN>";
    let PROJECT_ID = "<YOUR PROJECT ID>";
    switch (message.to) {
      case "your-pivotal-tracker-account@email.com":
        await fetch(`https://www.pivotaltracker.com/services/v5/projects/${PROJECT_ID}/stories`, {
          method: 'POST',
          headers: {
            'X-TrackerToken': `${API_TOKEN}`,
            'Content-Type': 'application/json'
          },
          body: JSON.stringify({
            story_type: "bug",
            current_state: "unstarted",
            name: `${message.headers.get('subject')}`,
            description: `${getLocaleTimestamp()}
            From: ${message.from}`
            })
        });
        //await message.forward("inbox@corp");
        break;

      default:
        message.setReject("Unknown address");
    }
  }
}
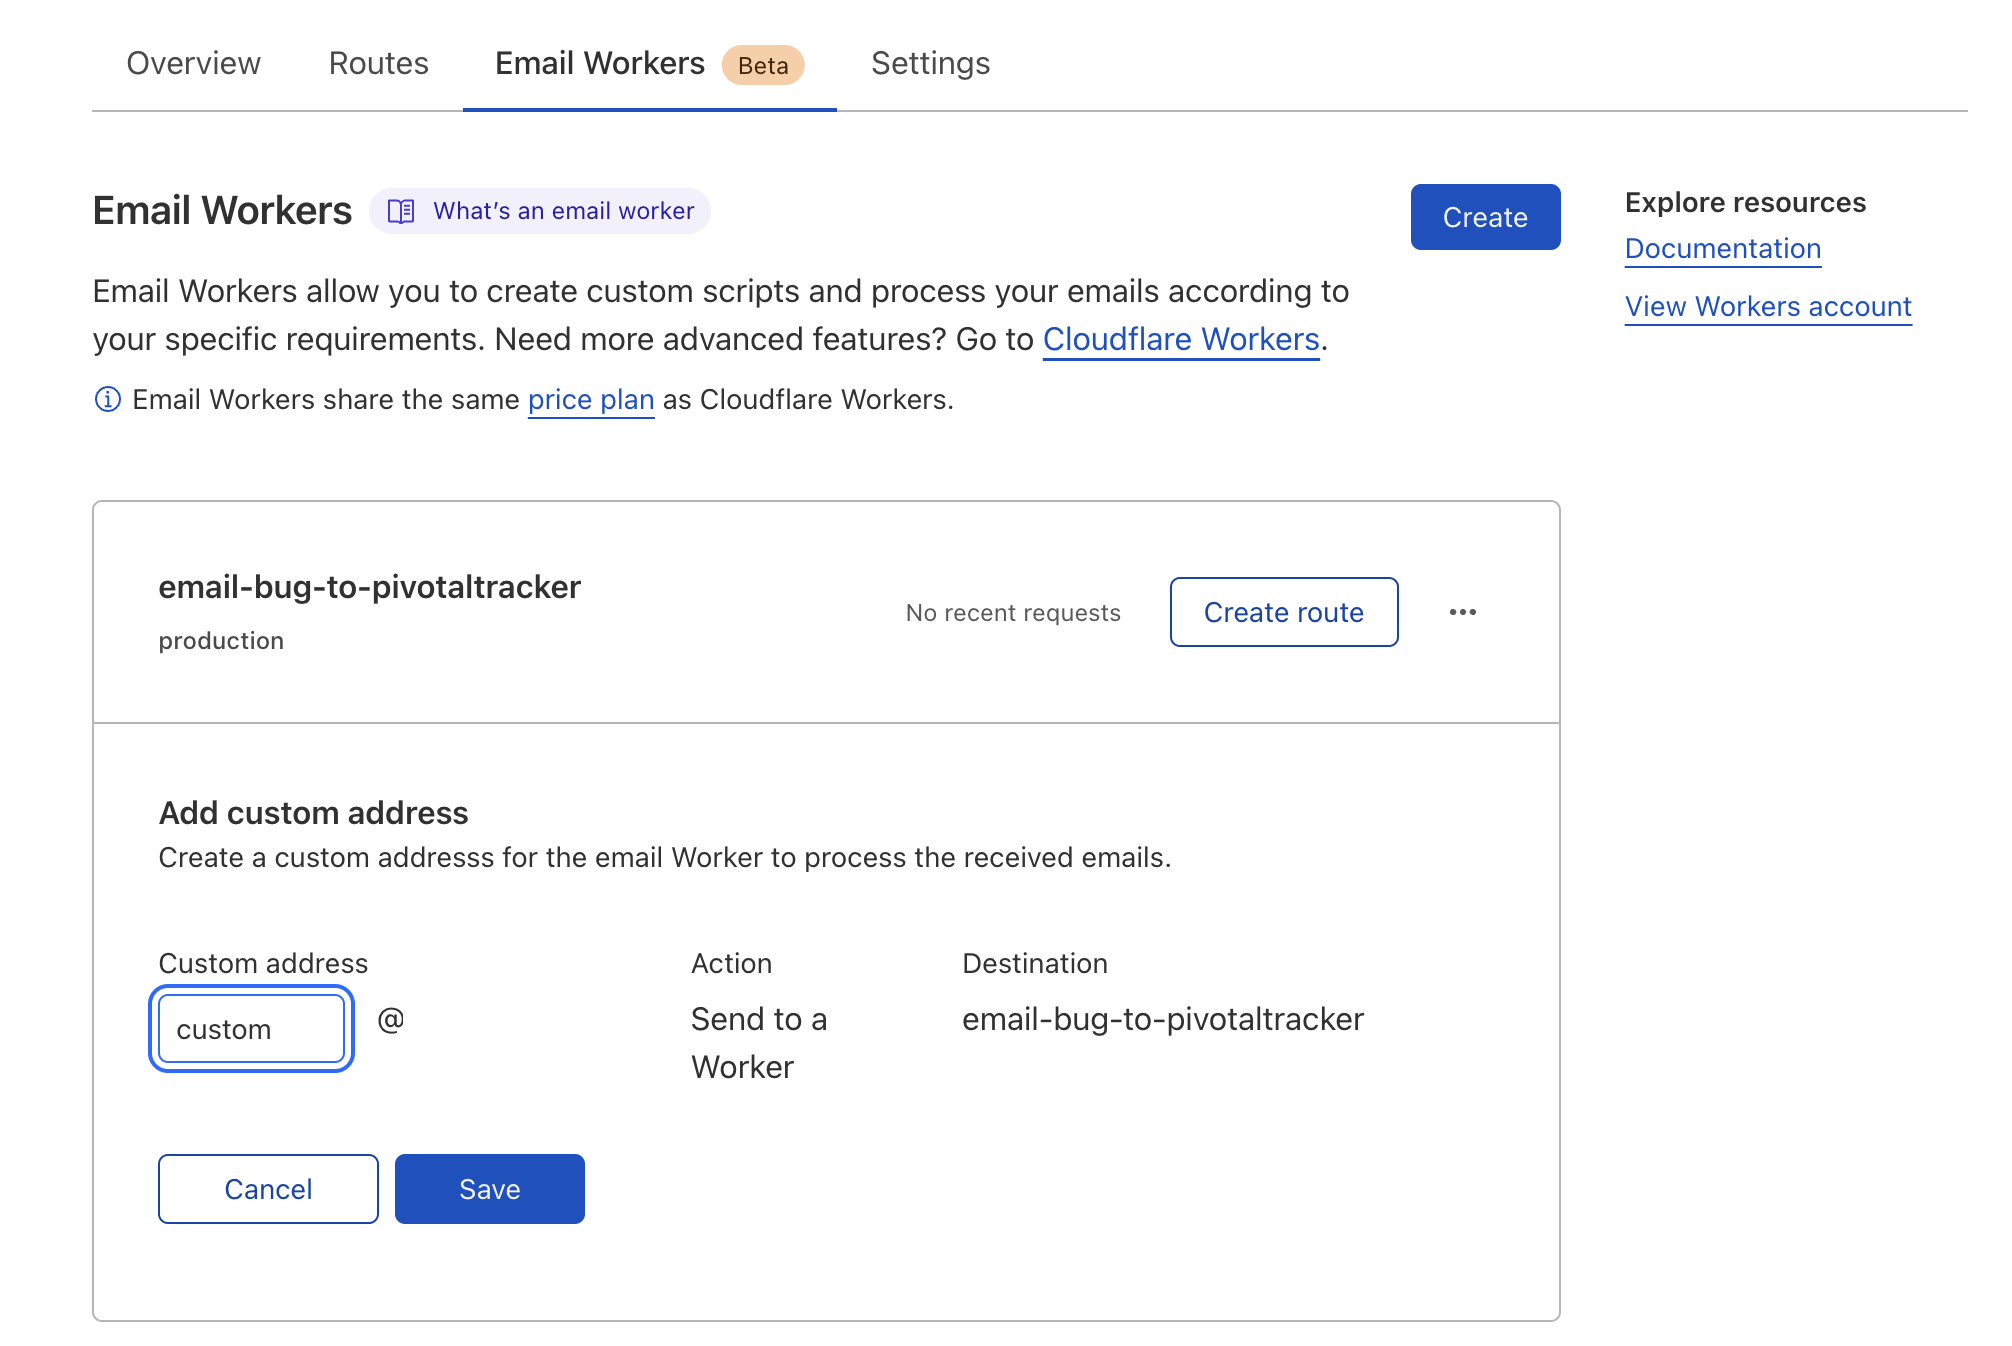
Step 4 - Create a Route
This is where you will input your custom email address and connect it to the Javascript worker.
Step 5 - Verify Pivotal Tracker
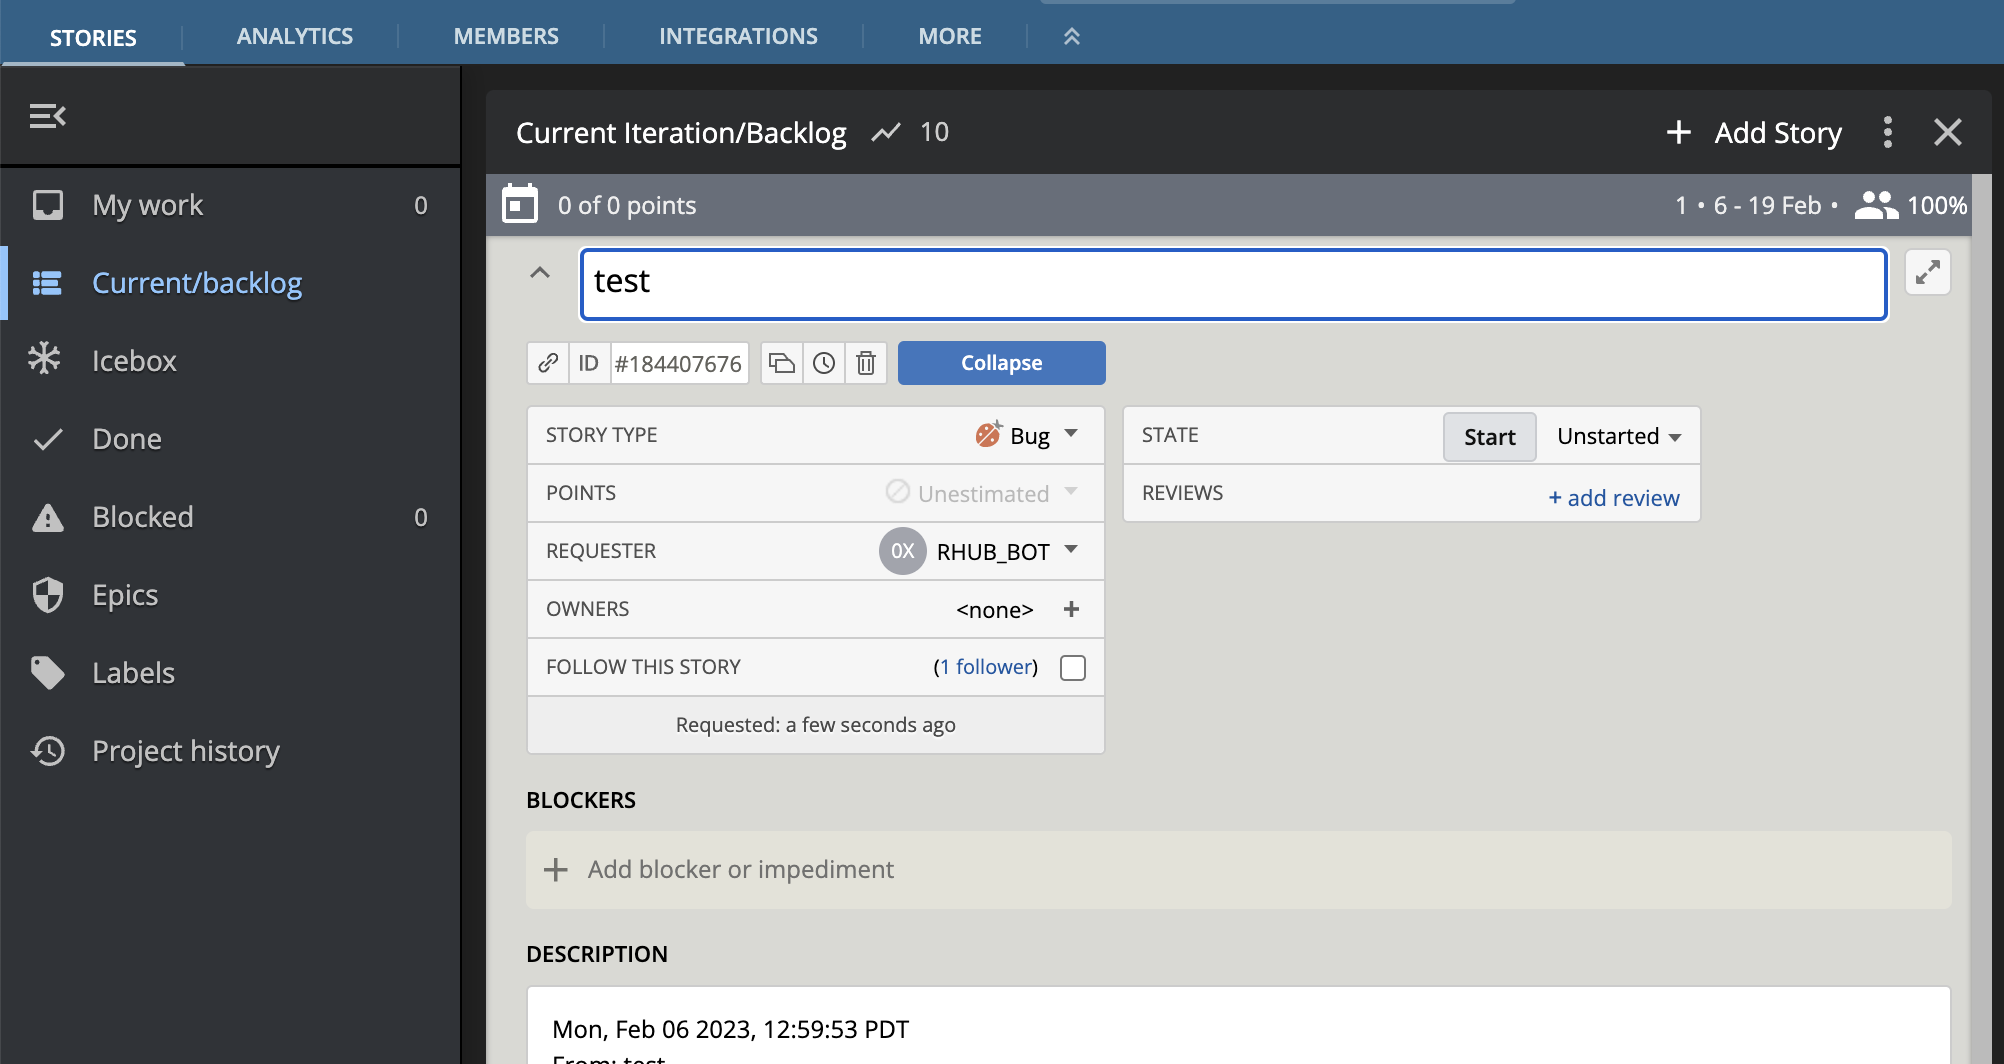
You are in good hands if you see a bug task within Pivotal Tracker.