How to encrypt a USB thumb drive with HSF+ (Journaled) using Disk Utility and Terminal.
WARNING
This article will teach you how to encrypt your drive as HFS+ (Journaled). Do not follow these steps if you want to encrypt using APFS.
Step 1 - Insert a USB drive and Open up Terminal

Step 2 - List Your Drives
Our first step is to list all of our available drives. Since we plan to format a USB drive, we will use grep as a filter and only show external drives.
diskutil list | grep 'external, physical'You should see something terrifying like this.
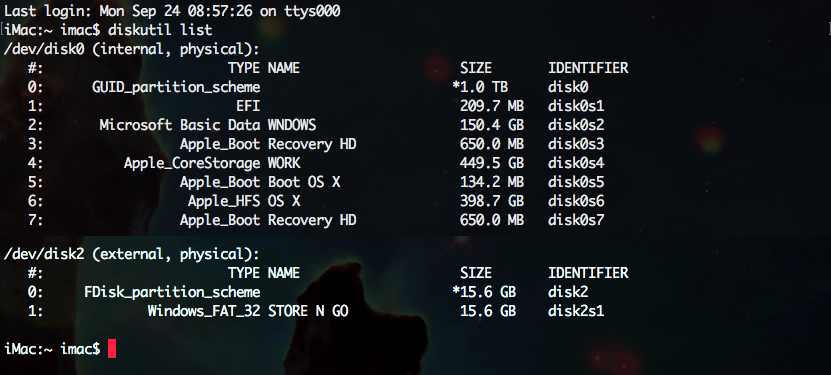
To find our USB thumb drive, let's look for clues.
- Clue 1 -
external, physicalmeans it's an external, physical drive. - Clue 2 - Look for something that matches the name of your USB thumb drive. My drive is currently titled "STORE N GO."
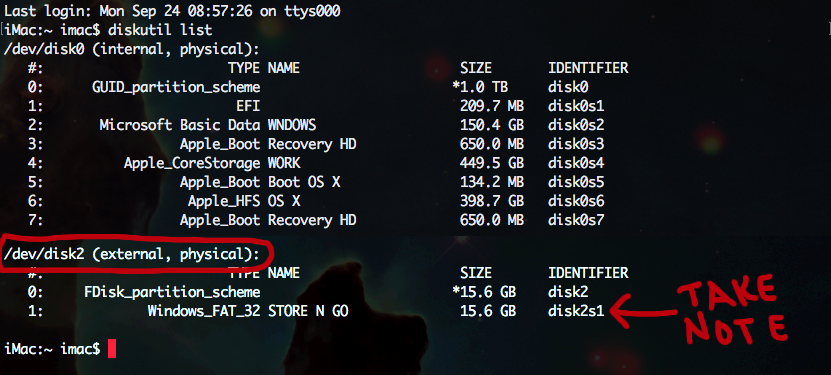
Take node of the "IDENTIFIER." My identifier is titled disk2s1, and that is the drive and partition we will be formatting.
Step 3 - Reformat
This command is telling Apple's Disk Utility to erase the disk and format it for Mac OS Extended, Journaled Hierarchical File System Plus (JHFS+).
Take note that the only reason why this process works is that we are making a GUID partition map (GPT).
diskutil eraseDisk JHFS+ "My New Storage" GPT disk2
Step 4 - Encrypt
This final step is to encrypt the file partition with the disk identifier disk2s2.
diskutil cs convert disk2s2 -passphrase