
There are many tutorials on how to install SSL certificates using a AWS Bitnami but I wanted to purchase an SSL cert from GoDaddy and install things manually. Here's how.
This is Part 2 of Installing a secure WordPress blog on AWS EC2 using Bitnami.
Step 0 - Getting Started
You won't need these but it's helpful to know that there are a few existing pre-installed certificates.
ls /opt/bitnami/apache2/conf/
Bitnami created this server certificate for you.
openssl x509 -noout -text -in /opt/bitnami/apache2/conf/server.crt -modulus | grep Modulus
Bitnami created this server key for you.
openssl rsa -noout -text -in /opt/bitnami/apache2/conf/server.key -modulus | grep Modulus
Step 1 - Create a private key and certificate signing request
Change directory to Apache config.
cd /opt/bitnami/apache2/conf/
Create a private, RSA key.
openssl genrsa -des3 -out myPrivKey.key 2048
Create a certificate.
openssl req -new -key myPrivKey.key -out myCert.csr
Complete this form.
Country Name (2 letter code) [XX]: US

State or Province Name (full name) []: California

Locality Name (eg, city) [Default City]: Los Angeles

Organization Name (eg, company) [Default Company Ltd]: Chris Mendez Inc.

Organizational Unit Name (eg, section) []: I SKIP THIS

Common Name (eg, your name or your server's hostname) []: www.chrisjmendez.com

Email Address []: myemail@domain.com
This produces a public/private key pair but then extracts the public key into its own file.
openssl rsa -in myPrivKey.key -pubout > myPublicKey.pub
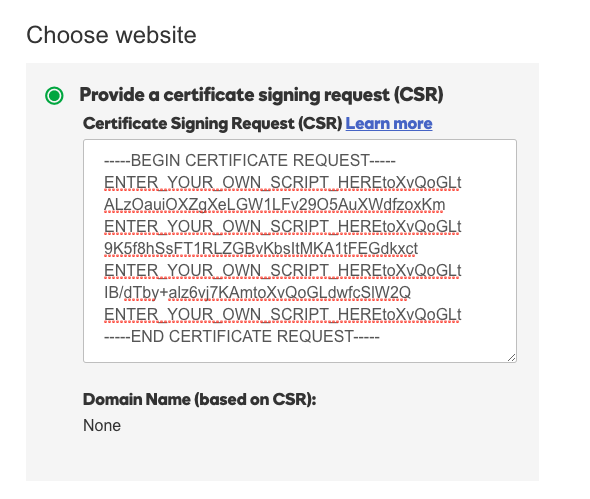
This is what you will paste into the SSL you purchase.
nano myCert.csr
The contents will look something like this.
Step 2 - Download files from your SSL issuer
Download the files from Godaddy.com or wherever you purchased your your SSL issuer (ca_bundle, cert, key).
Step 3 - Upload the files to your EC2 instance
You can use secure copy scp to upload your files from your local computer to EC2. In this command, we're uploading the files to a Bitnami specific folder on EC2.
scp -i /local/path/to/your/<key name>.pem /local/path/to/your/ssl/[certificates].zip bitnami@<ec2.ip.address>:/opt/bitnami/apache2/conf/
Step 4 - Unzip any files
If your files are in zip, gzip, or tar.gz format you'll need to unpack them.
unzip file.zip
Step 5 - Point EC2 instance to your new certificates
Open this file and make sure bitnami.conf is pointing to the certificates.
nano /opt/bitnami/apache2/conf/bitnami/bitnami.conf
This is where you will modify your Virtual Host.
<VirtualHost _default_:80>
  DocumentRoot "/opt/bitnami/apache2/htdocs"

  #CHANGED - ADDED THIS
  #I added this to see if I can enforce https
  RewriteEngine On
  RewriteCond %{HTTPS} !=on
  RewriteRule ^/(.*) https://%{SERVER_NAME}/$1 [R,L]

  <Directory "/opt/bitnami/apache2/htdocs">
  ...
Comment out the previous certificate + key information and add your own.
<VirtualHost _default_:443>
  DocumentRoot "/opt/bitnami/apache2/htdocs"
  SSLEngine on
#SSLCertificateFile "/opt/bitnami/apache2/conf/server.crt"
 SSLCertificateFile "/opt/bitnami/apache2/conf/<name of certificate>.cert"
#SSLCertificateKeyFile "/opt/bitnami/apache2/conf/server.key"
 SSLCertificateKeyFile "/opt/bitnami/apache2/conf/<name of key>.key"
 # This might not be available
 SSLCACertificateFile "/opt/bitnami/apache2/conf/<name of bundle>.cabundle"
 # This might not be available
 SSLCertificateChainFile "/opt/bitnami/apache2/conf/gd_bundle-g2-g1.crt"

  <Directory "/opt/bitnami/apache2/htdocs">
  ...
Step 6 - Double check + Restart
Best practice is to check your configuration before you restart.
apachectl configtest
If things look good, then let's restart Apache the Bitnami way.
sudo /opt/bitnami/ctlscript.sh restart apache
Step 7 - Install Really Simple SSL for WordPress
If you'd like to manage your SSL from within WordPress, I suggest Really Simple SSL plug-in.
Thanks!
Troubleshooting
Really Simple SSL
After installing Really Simple SSL, it may announce that you need to change the permissions of wp-config.php.
This is where you change the file:
cd /opt/bitnami/apps/wordpress/htdocs/
This changes the config to rwxrwx---
sudo chmod -v 770 daemon:daemon wp-config.php
This changes the owner.
sudo chown -v -R daemon:daemon wp-config.php