If you want to create a simple website consisting of 4-5 pages without paying for a subscription with platforms like Wix, Squarespace, Ghost, etc., you can use Cloudflare. This service, combined with Cloudflare's premium domain and DNS hosting, is an impressive offering.
Svelte is a radical new approach to building websites. It borrows the best parts of React and Vue and provides a simple, intuitive approach to front-end development.
The steps below assume you are building a Svelete website from scratch.
Step 0 - Install Node Version Manager (NVM)
Read my previous tutorial on installing NVM to install Node v16.14.
Step 1 - Create a Repo within Github
Most tutorials start by creating a project on your local computer that you publish to Github. I prefer to do it the other way around. It minimizes any potential issues for error.
Visit Github and create a new repo.
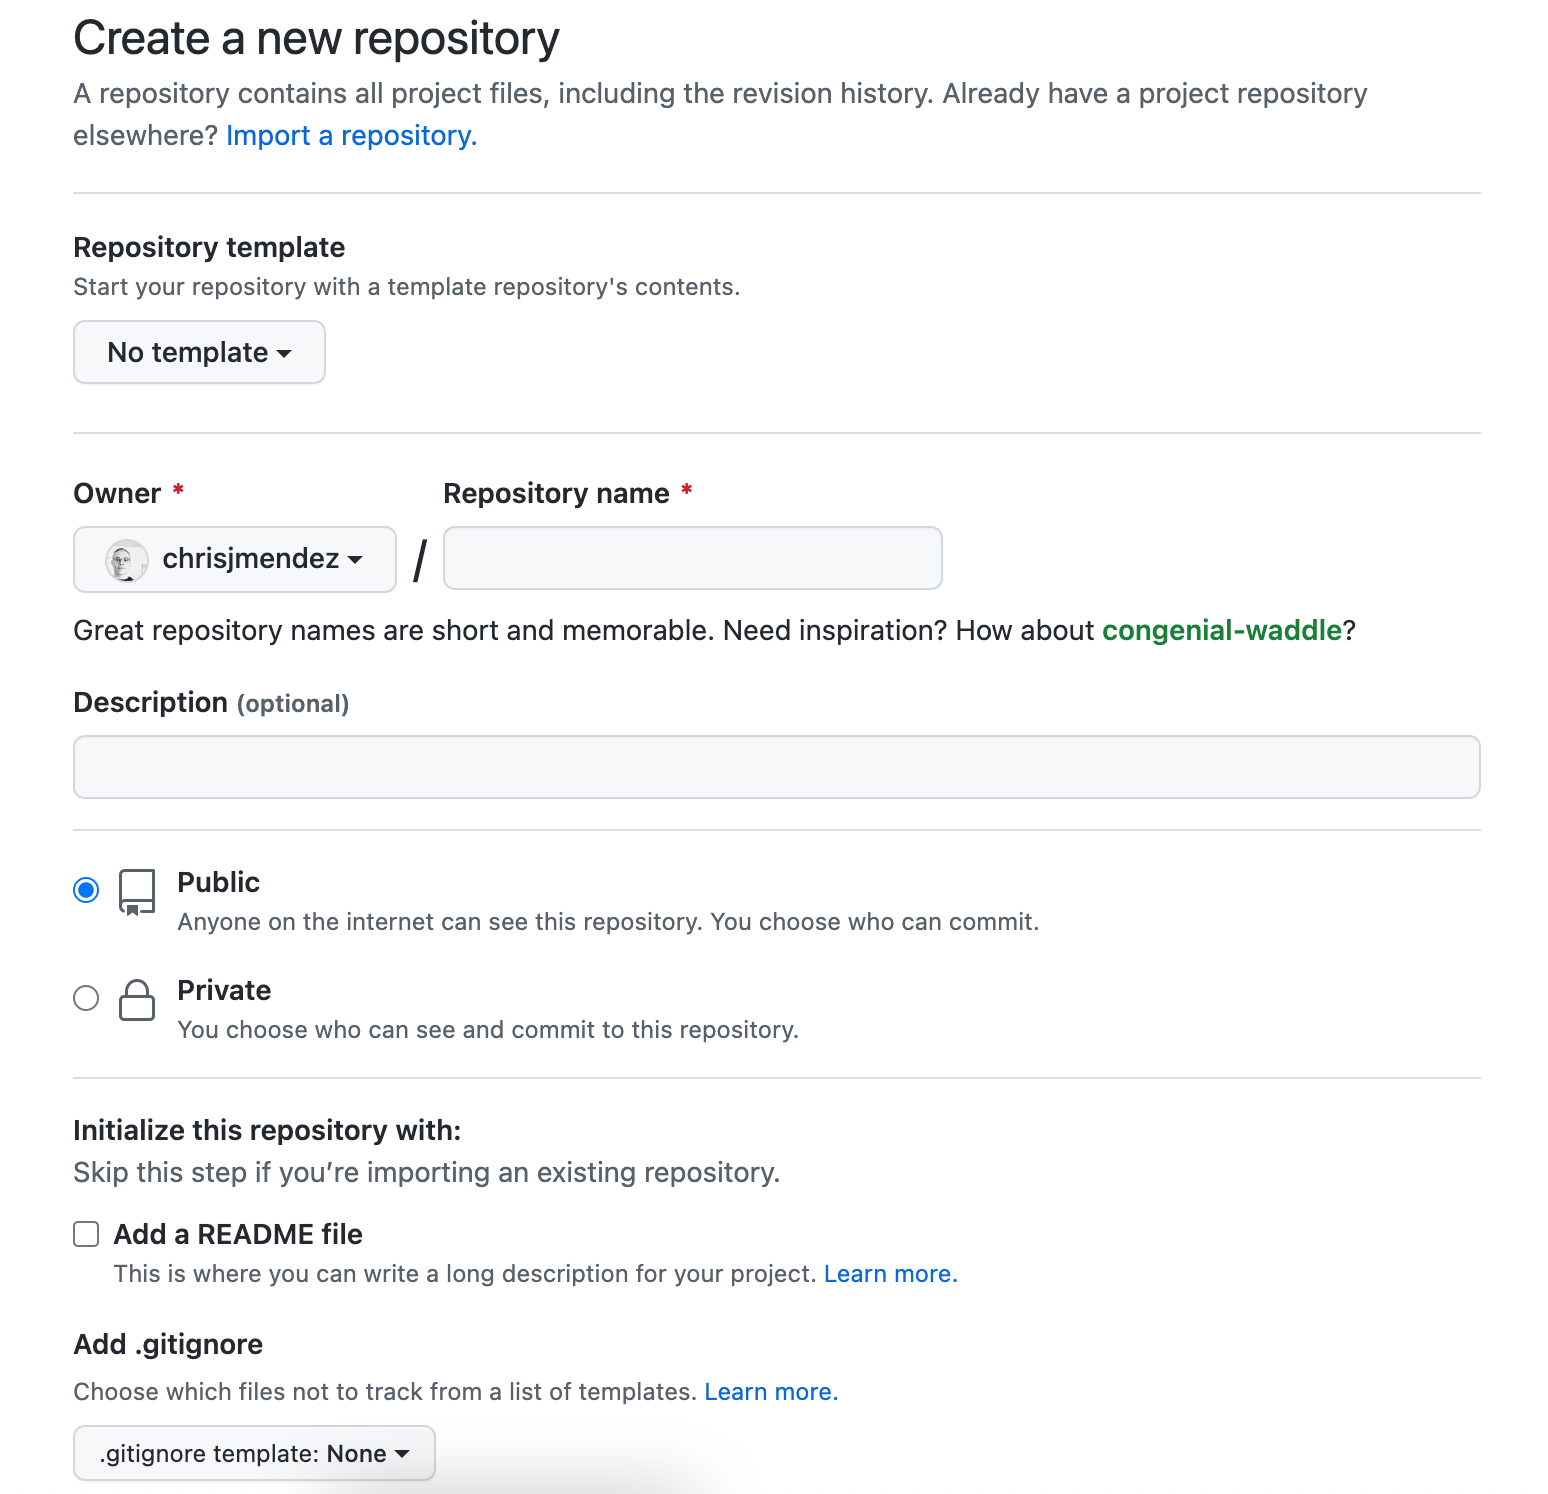
Download your repo using git.
git pull https://github.com/my-account/www.mywebsite.com.git
Use this .gitignore tool to create a custom .gitignore file.
Step 2 - Install Svelte
Change the directory to your git repo.
cd /path/to/my-account
npm init svelte@latest ./
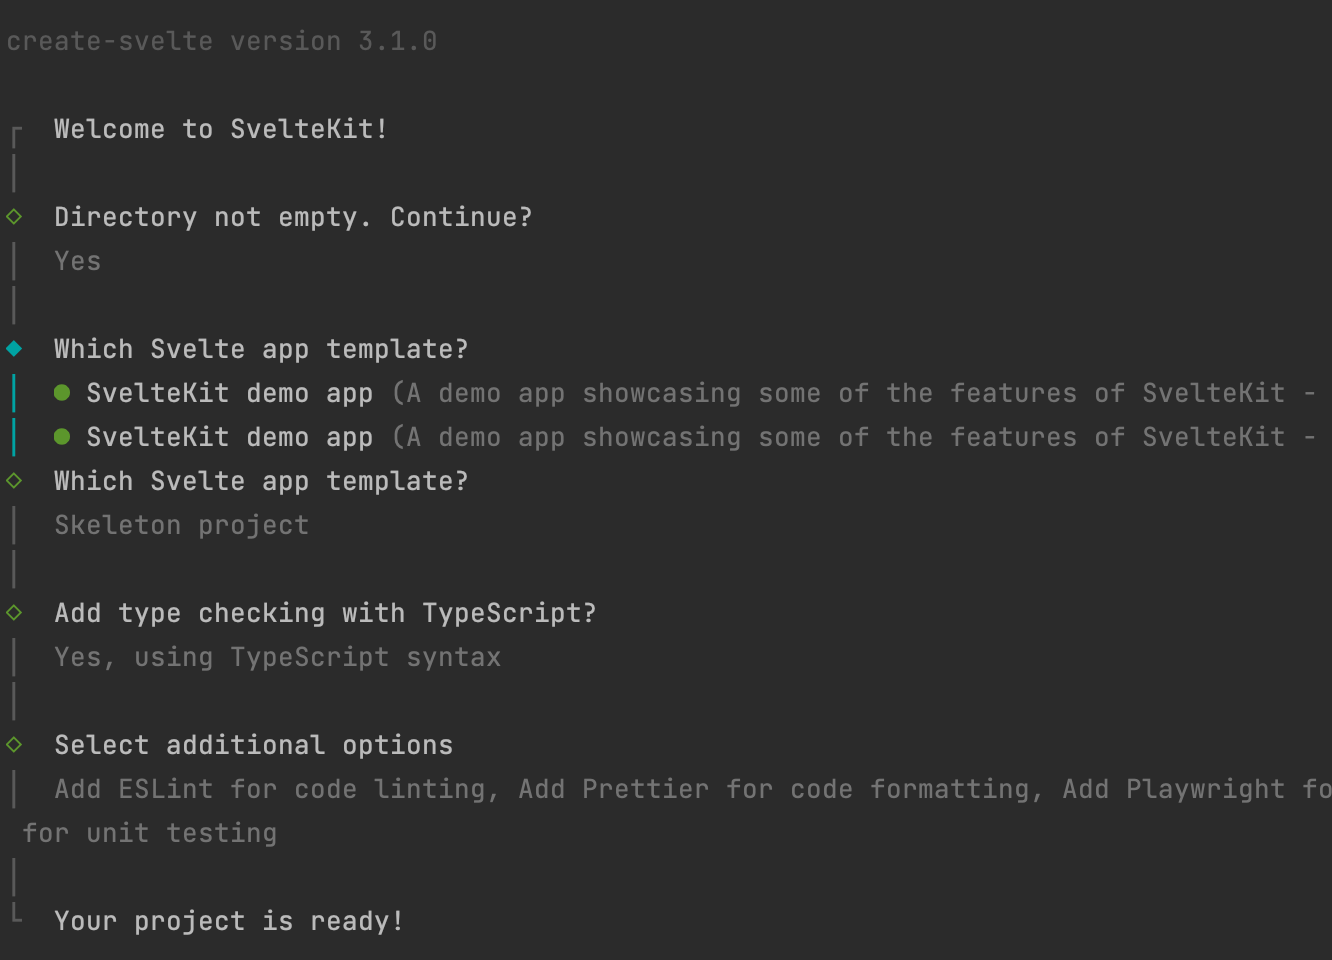
I picked Skeleton project, typescript, and all the extra goodies such as ESLint and Pretty.
Step 3 - Install Cloudflare Adapter
The next step is to add [Cloudflare Pages] by adding the Cloudflare adapter library.
npm i --save-dev @sveltejs/adapter-cloudflare
Open svelte.config.js and make it look like this:
//import adapter from '@sveltejs/adapter-auto';
import { vitePreprocess } from '@sveltejs/kit/vite';

import adapter from '@sveltejs/adapter-cloudflare';

/** @type {import('@sveltejs/kit').Config} */
const config = {
	// Consult https://kit.svelte.dev/docs/integrations#preprocessors
	// for more information about preprocessors
	preprocess: vitePreprocess(),

	kit: {
		// adapter-auto only supports some environments, see https://kit.svelte.dev/docs/adapter-auto for a list.
		// If your environment is not supported or you settled on a specific environment, switch out the adapter.
		// See https://kit.svelte.dev/docs/adapters for more information about adapters.
		adapter: adapter()
	}
};

export default config;
Open src/app.d.ts and make it look like this:
// See https://kit.svelte.dev/docs/types#app
// for information about these interfaces
declare global {
	namespace App {
		// interface Error {}
		interface Locals {}
		// interface PageData {}
		interface Platform {
			env: {
				COUNTER: DurableObjectNamespace;
			};
		    context: {
		    	waitUntil(promise: Promise<any>): void;
		    }
			caches: CacheStorage & { default: Cache }
		}
	}
}

export {};
Verify Your Work
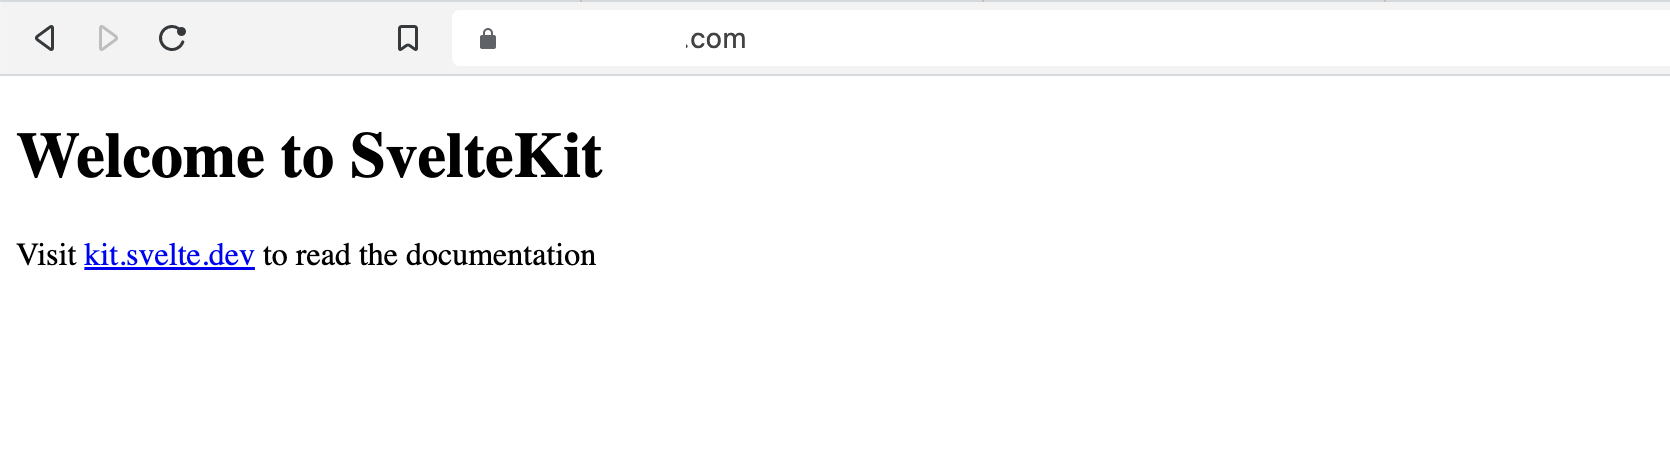
Run your application to verify your work. You should be able to access the site from http://127.0.0.1:5173/
npm run dev
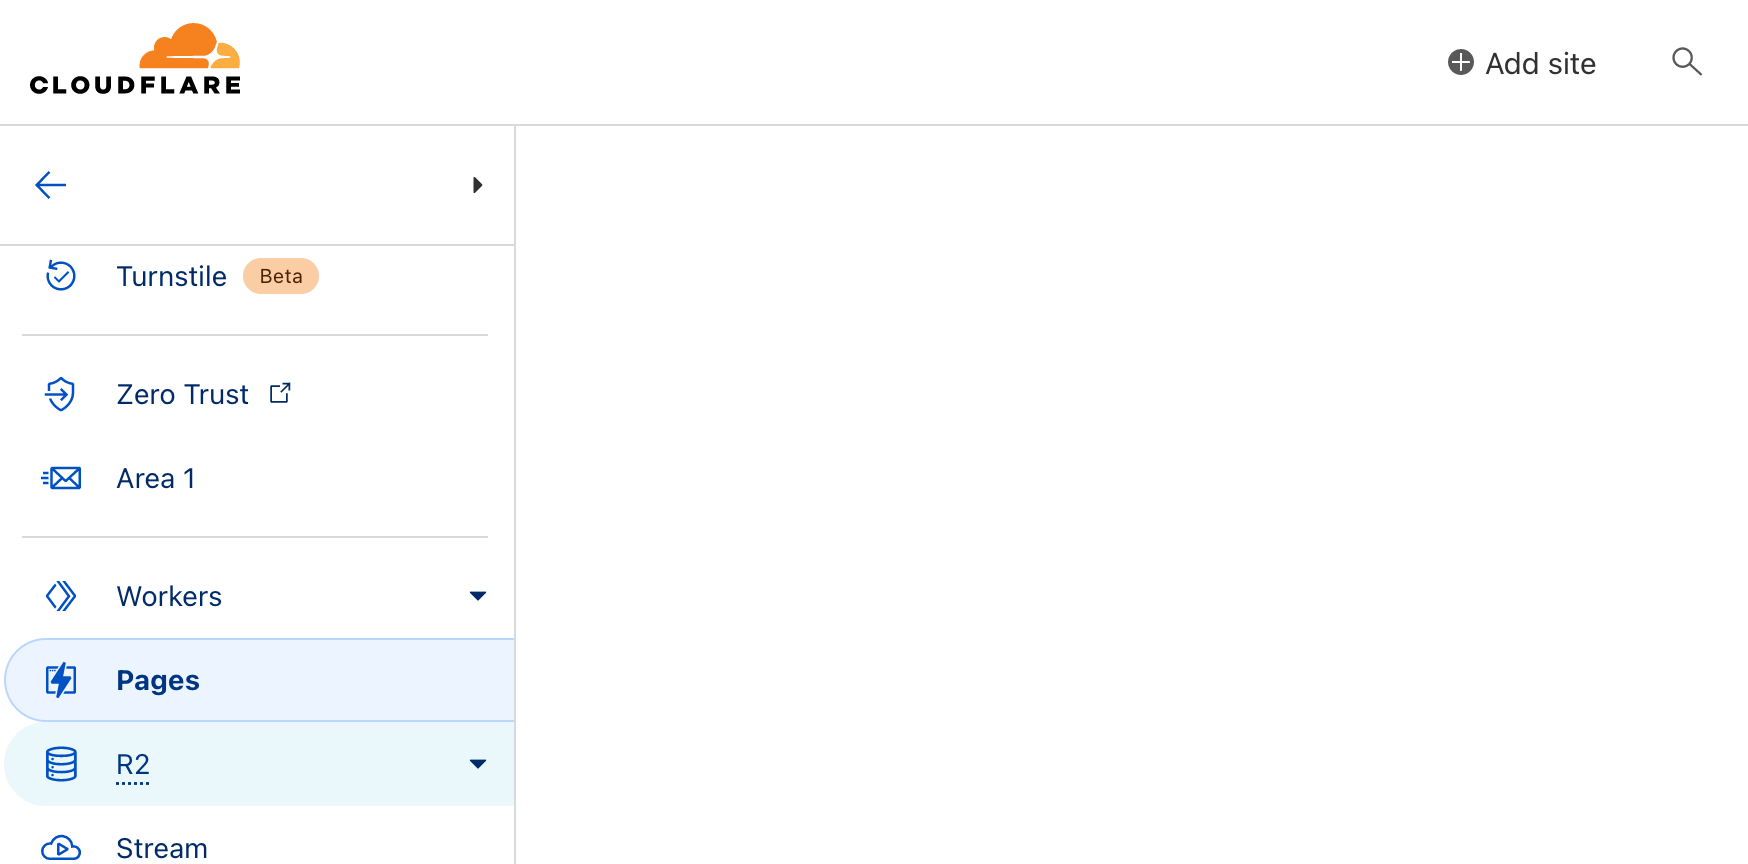
Step 4 - Create a Page
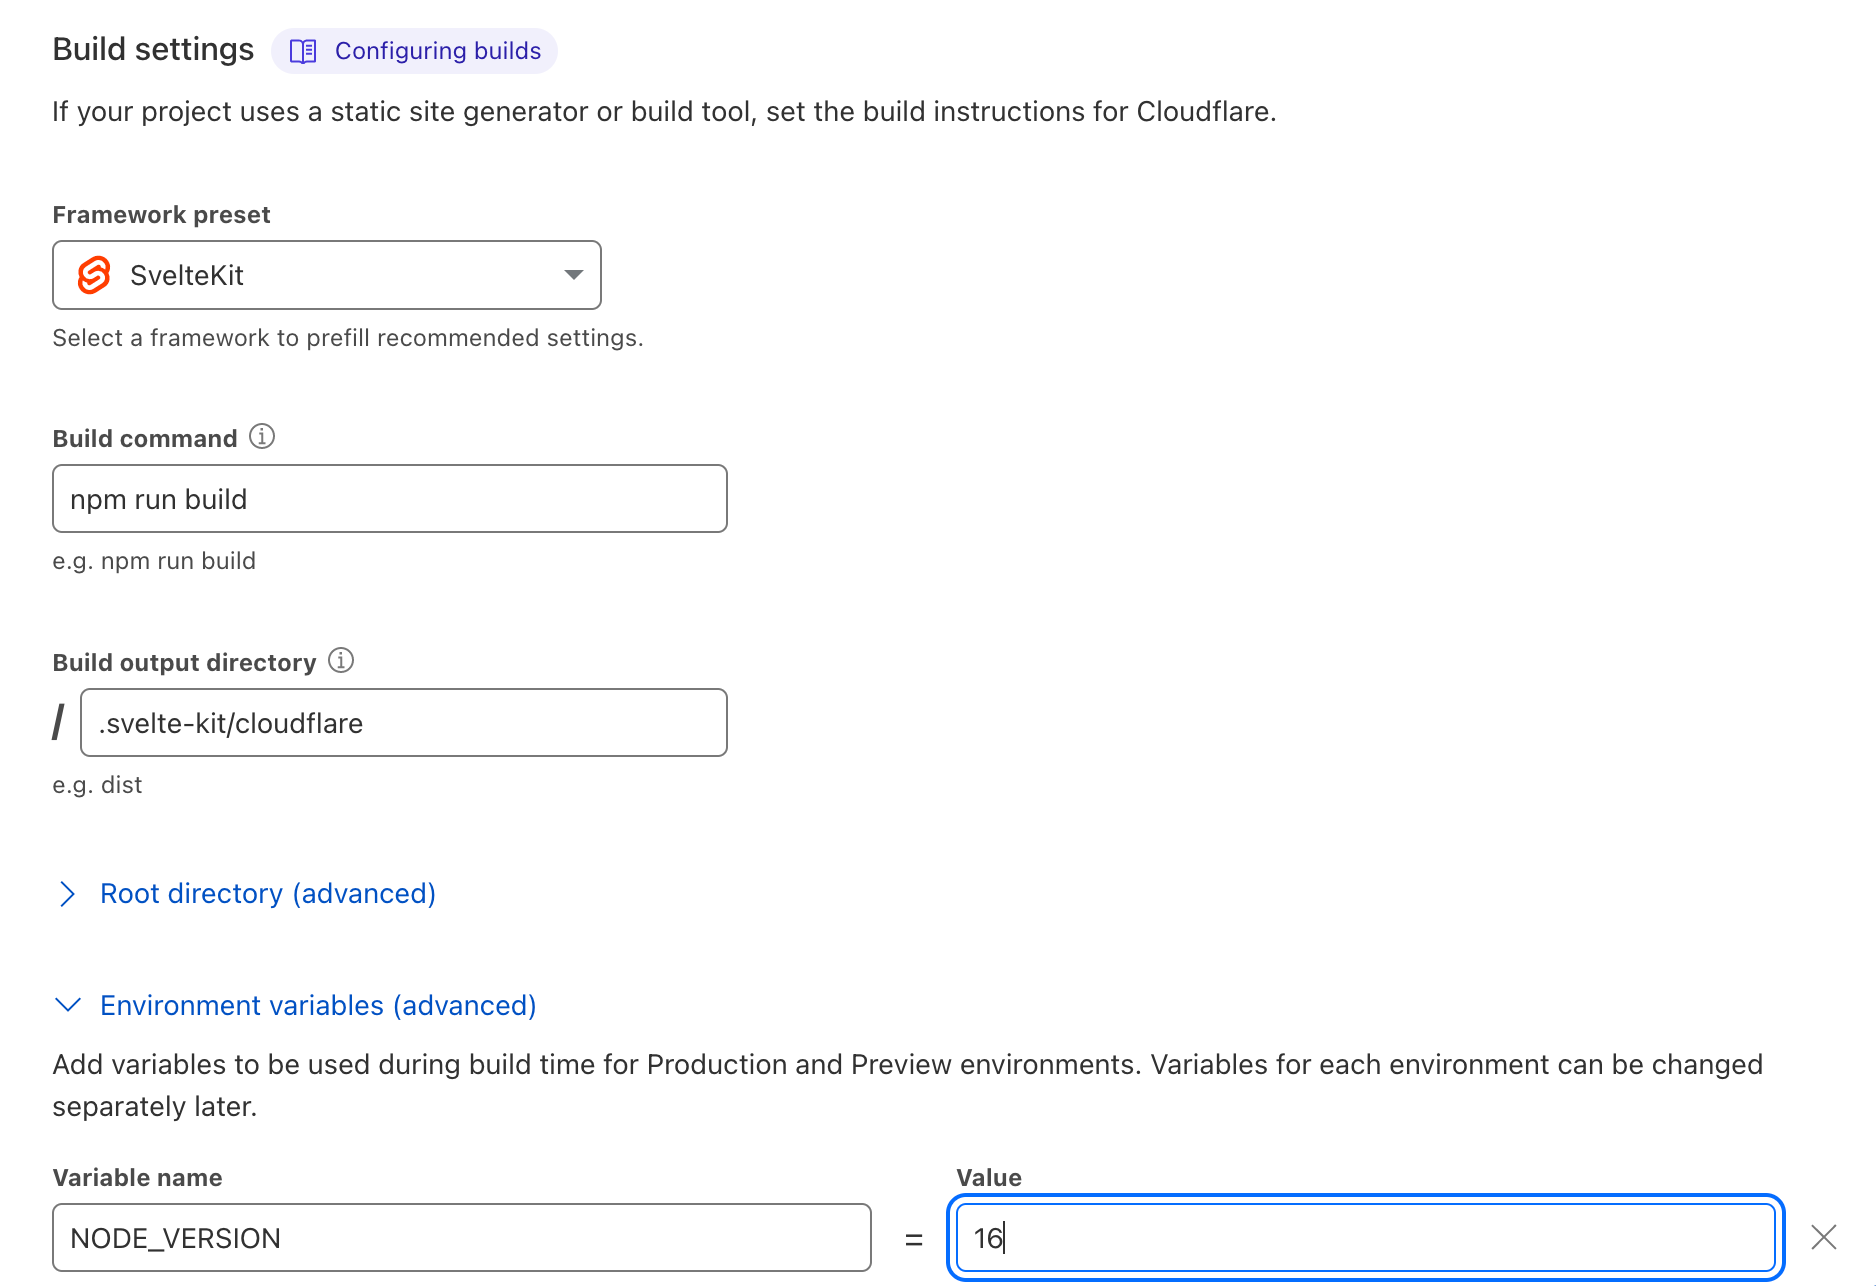
The next step is going into Cloudflare and creating a page.
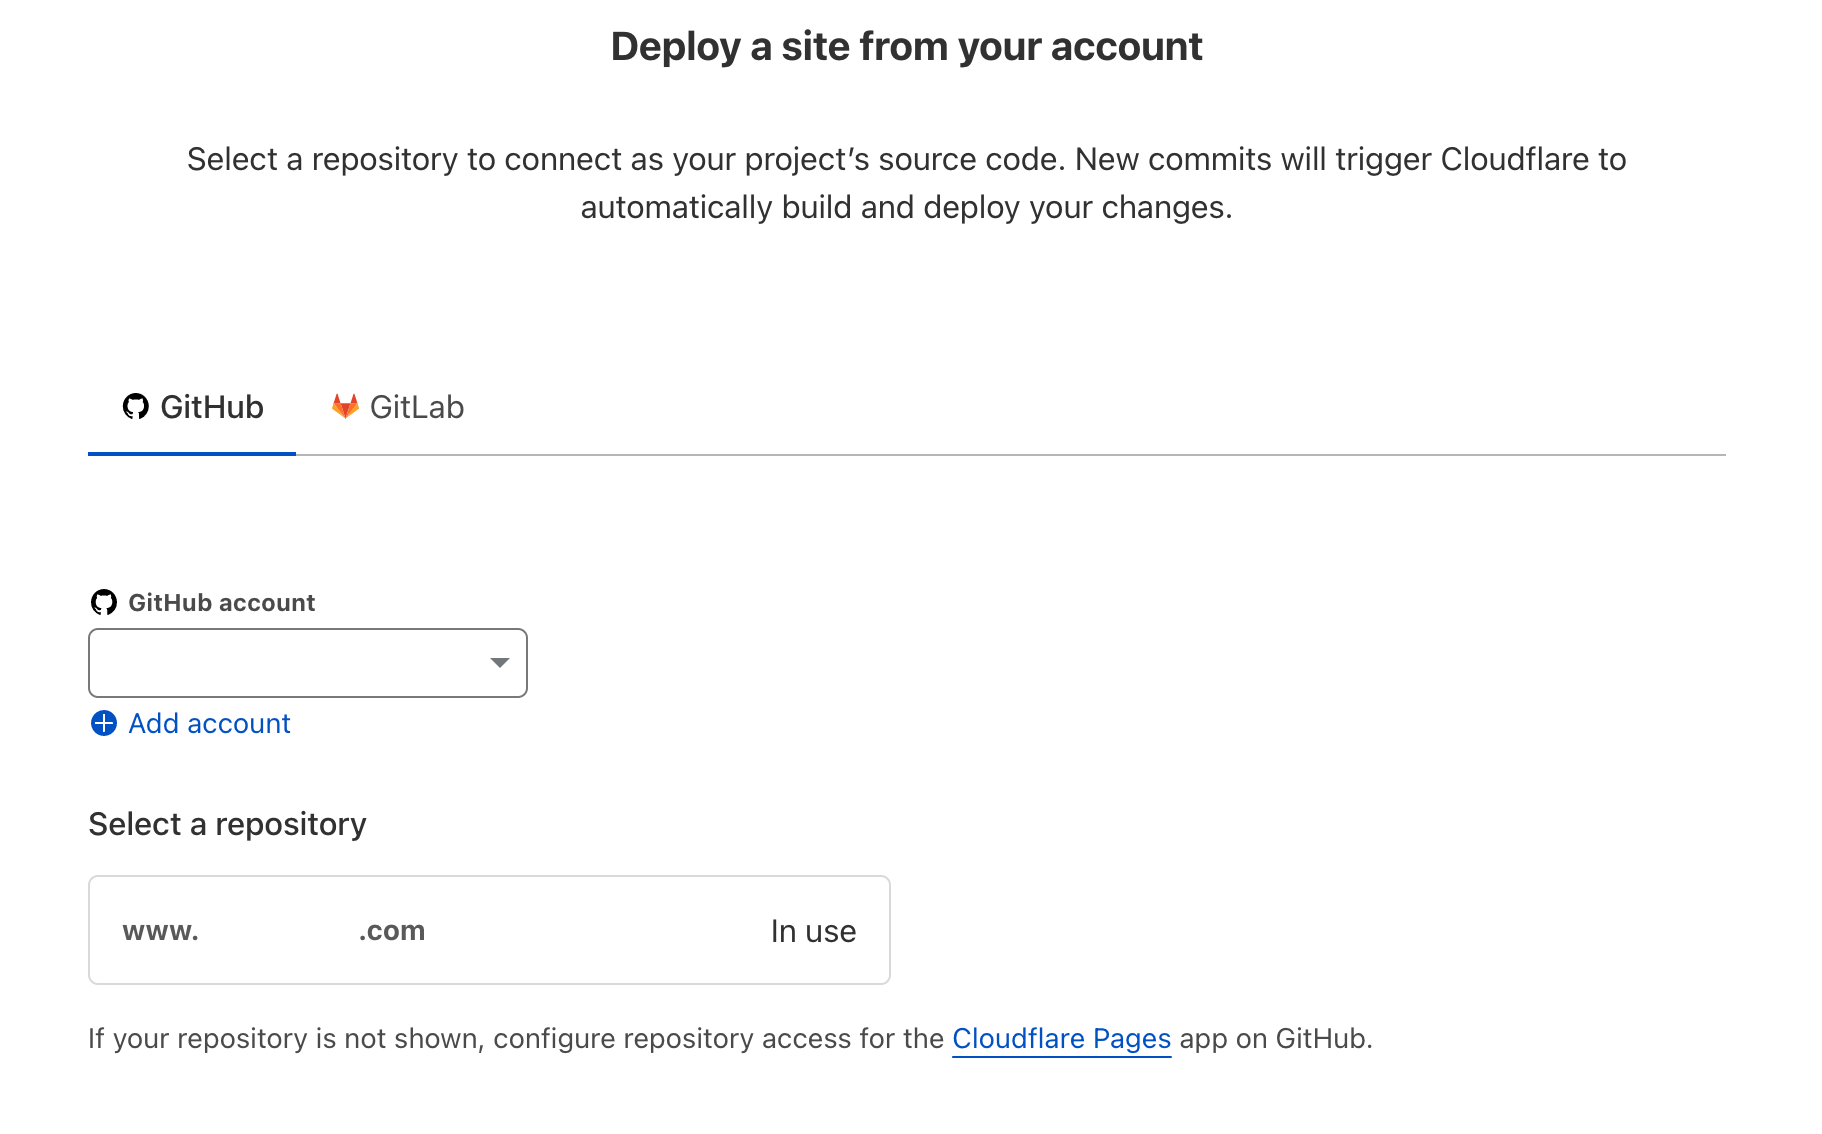
You must connect your Cloudflare page to the main branch. You will then need to add these configurations.
Step 5 - Publish to GitHub
git add -A
git commit -m 'initial import
git push
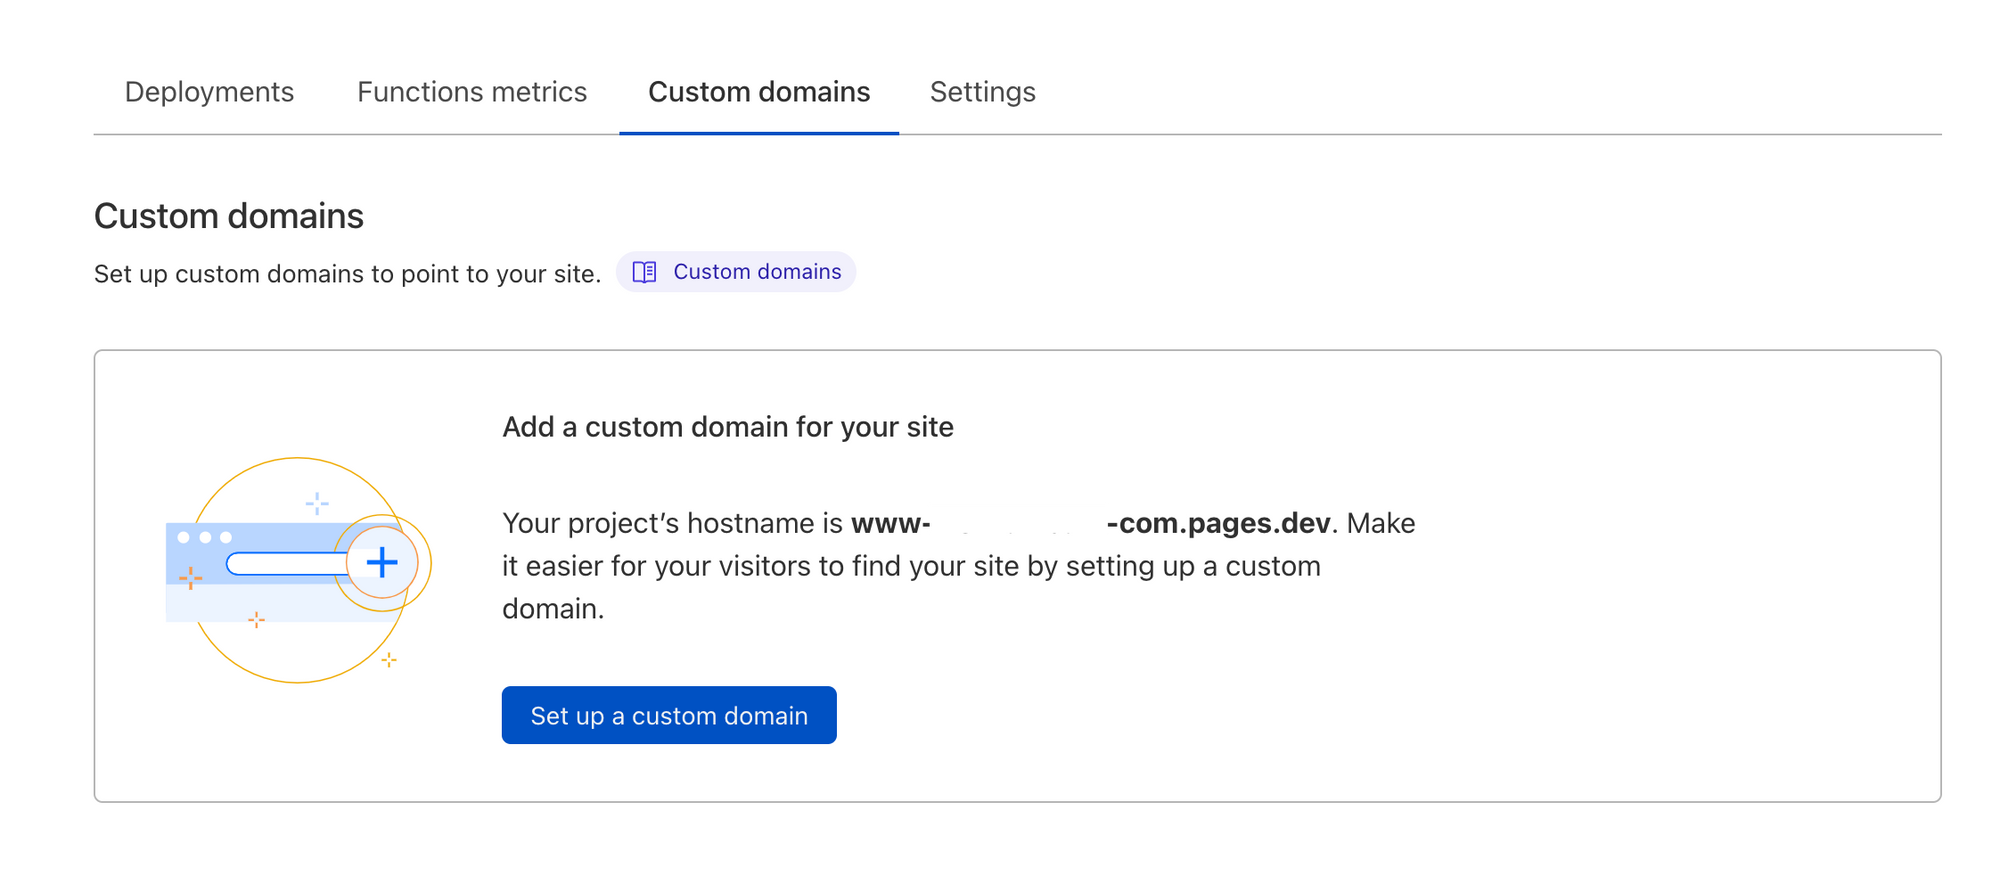
Step 6 - Create a Custom Domain
Step 7 - Done!
Woot Woot! You're done!