Elastic Beanstalk is a one-stop shop for Ruby on Rails developers to publish their apps. In this tutorial, I'll show you how to first commit your app to AWS CodeCommit so that you can then publish over to EB.
There are a lot of steps so here's a high-level overview:
- Create a Group and attach policies that grant you access to CodeCommit.
- Add users to the group.
- Create a CodeCommit repository.
- Configure your local computer to work with AWS.
- Create a local profile on your computer to connect to your CodeCommit repo (using Git).
Managing Users & Access
Step 1 - Create a Group
Groups are utilities that help you establish permissions to a group of users. As a first step, visit the Groups section within Identity and Access Management (IAM) console and create a new group.
Step 2 - Attach Policies to Your Group
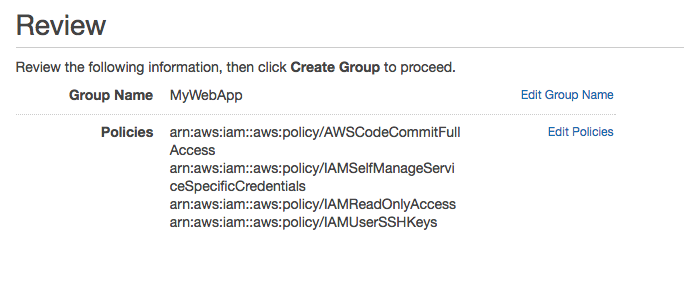
Once you've created a group, you'll need to grant access. Here are a few policies I offer to CodeCommit contributors.
AWSCodeCommitFullAccessoffers full access to CodeCommit.IAMSelfManageServiceSpecificCredentialsallows developers a way to authenticate using git credentials.IAMUserSSHKeysenables users to authenticate using SSH credentials.IAMReadOnlyAccessprovides IAM read-only access.
This is what your group should look like.
Source: Setting Up Code Commit
Step 3 - Create a user
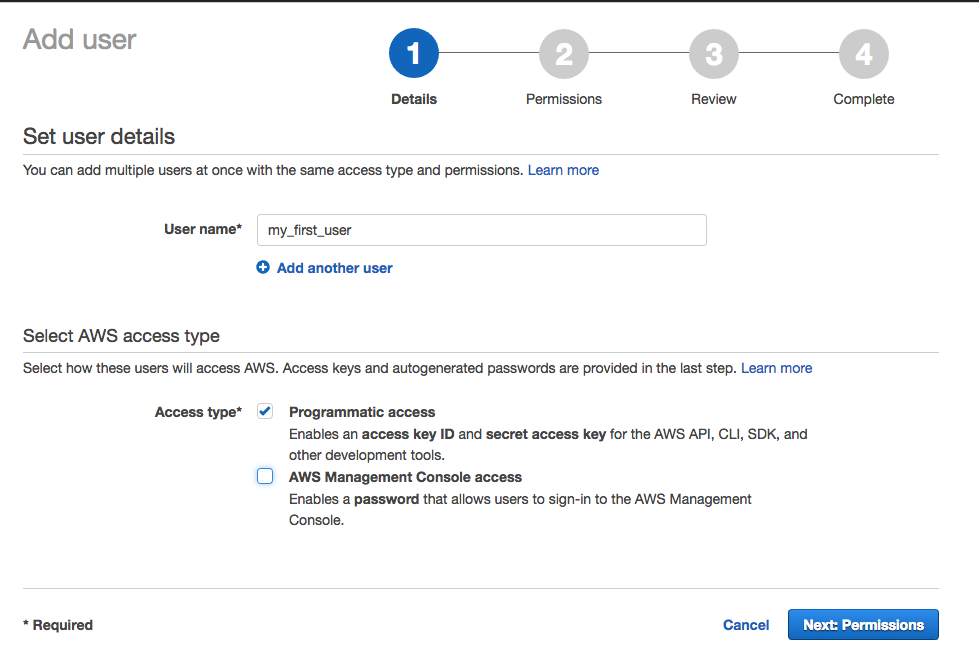
If you haven't created a user yet, visit IAM on AWS console and create a new user with Access Keys.
Step 4 - Add users to your group
The next step is to add your users to this specific group using the IAM AWS console.
Managing CodeCommit
Step 5 - Create a CodeCommit Repo
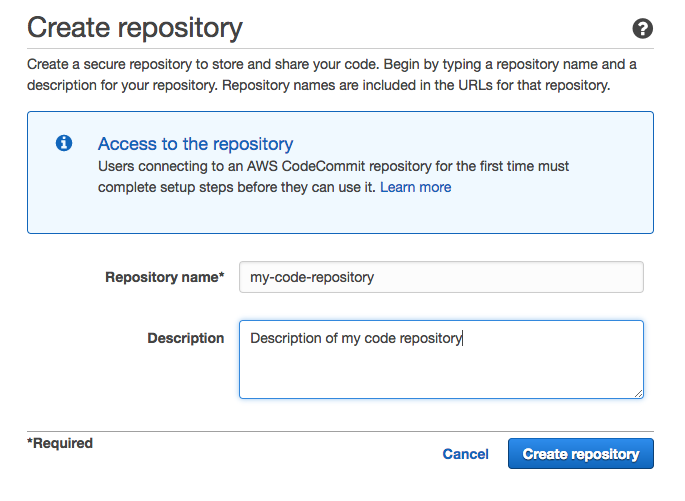
You will need to make sure that you've created a repository for your code. Visit the CodeCommit section of the AWS Console to create your git repo.

Make sure you get the URL of the repo. It will look something like this:
https://git-codecommit.us-east-1.amazonaws.com/v1/repos/name-of-your-website
Configuring Your Local Environment
The first step to configuring your local environment is to install the AWS client libraries. In order to keep things up-to-date and organized, I use Homebrew to manage my libraries. If you're not familiar with Homebrew, I suggest you How to Install AWS Client using Homebrew.
Step 6 - Download AWS Client
Once you've installed homebrew, download the AWS commnd-line interface.
brew install awscli
Step 7 - Download AWS Elastic Beanstalk Client
Amazon Web Services offers multiple command-line clients. Now that you've installed awscli it's time to install Elastic Beanstalk command-line interface
brew install awsebcli
Managing User Profiles
Step 8 - Managing User Profiles
You first need to make sure that you've configured your AWS client account by creating a user profile.
Read this tutorial for further instructions.
Spelling it out, you will actually need to create two users.
The first user is your IAM user account (which we completed in steps 1-4). The second user is your git user. You create a git user account by visiting User > myuser > Security Credentials.
The url looks like this with changes to MY_REGION and MY_USER_NAME.
https://us-west-1.console.aws.amazon.com/iam/home?region=us-MY_REGION-1#users/MY_USER_NAME?section=security_credentials
At the bottom of the Security Credentials tab, you will find a section where you can create a git user.

Managing Git
Step 9 - Configuring Git
Once you've created a user profile, then you can connect it to Git using the credential helper.
The AWS credential helper will connect your CodeCommit Profile
git config --global credential.helper '!aws --profile myawsprofile codecommit credential-helper $@'
Tell AWS that you want to use HTTPS instead of git.
git config --global credential.UseHttpPath true
Step 10 - Download your repo
git clone https://git-codecommit.us-east-1.amazonaws.com/v1/repos/name-of-your-website
Troubleshooting Mac OS X
If you run into a problem like this and you're on a Mac, it probably has to do with Apple's Keychain Access. I suggest you use SSH (instead of HTTPS) to log in.
fatal: unable to access 'https://git-codecommit.us-east-1.amazonaws.com/v1/repos/my-website/': The requested URL returned error: 403
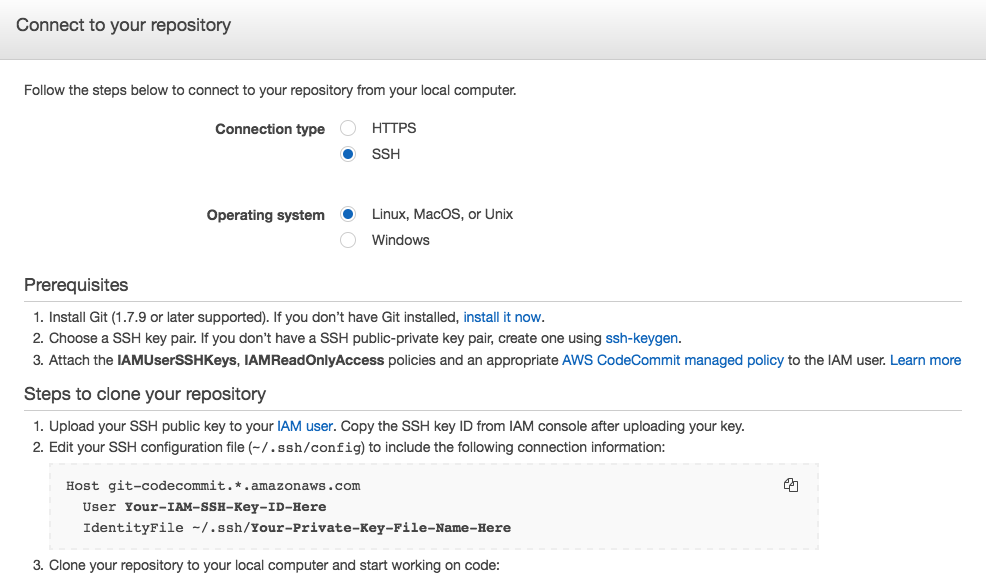
READ the section Steps to Clone Your Repository.
You can get your public SSH key to upload by typing:
nano ~/.ssh/id_rsa.pub
or you may have created a custom RSA public key.
If you do not have an RSA public key, then read Step 3 from this AWS Doc
This will configure your system using awsebcli.
nano eb init
Your Public key will likely be stored here.
nano ~/.ssh/aws-eb.pub
or
nano ~/.ssh/config
Host git-codecommit.*.amazonaws.com
  User APKAEIBAERJR2EXAMPLE
  IdentityFile ~/.ssh/codecommit_or_name_you_picked
Publish to Elastic Bean Stalk
In Part 2, we'll focus on how to publish from CodeCommit to Elastic Beanstalk.